Displaying recursive data using OutlineGroup in SwiftUI
This week we will talk about another excellent UI component called OutlineGroup. Apple released OutlineGroup during the WWDC20 side-by-side with other great things, including grids, menus, and toolbars. I already covered them in my previous posts. And finally, today is time to talk about OutlineGroup and DisclosureGroup that handles the expanding behavior.
Compare designs, show rulers, add a grid, quick actions for recent builds. Create recordings with touches & audio, trim and export them into MP4 or GIF and share them anywhere using drag & drop. Add bezels to screenshots and videos. Try now
OutlineGroup
OutlineGroup is a view that enumerates tree-structured collection and renders its view representation recursively. It is a perfect solution to display recursive data like trees. Assume that you are working on the shopping app where you obtain a categories tree via API. Let’s take a look at a straightforward tree implementation in Swift.
struct Tree<Value: Hashable>: Hashable {
    let value: Value
    var children: [Tree]? = nil
}
Now we have a pretty simple tree structure that allows us to define complex category hierarchy. For example, the API response from the categories endpoint might look like this.
let categories: [Tree<String>] = [
    .init(
        value: "Clothing",
        children: [
            .init(value: "Hoodies"),
            .init(value: "Jackets"),
            .init(value: "Joggers"),
            .init(value: "Jumpers"),
            .init(
                value: "Jeans",
                children: [
                    .init(value: "Regular"),
                    .init(value: "Slim")
                ]
            ),
        ]
    ),
    .init(
        value: "Shoes",
        children: [
            .init(value: "Boots"),
            .init(value: "Sliders"),
            .init(value: "Sandals"),
            .init(value: "Trainers"),
        ]
    )
]
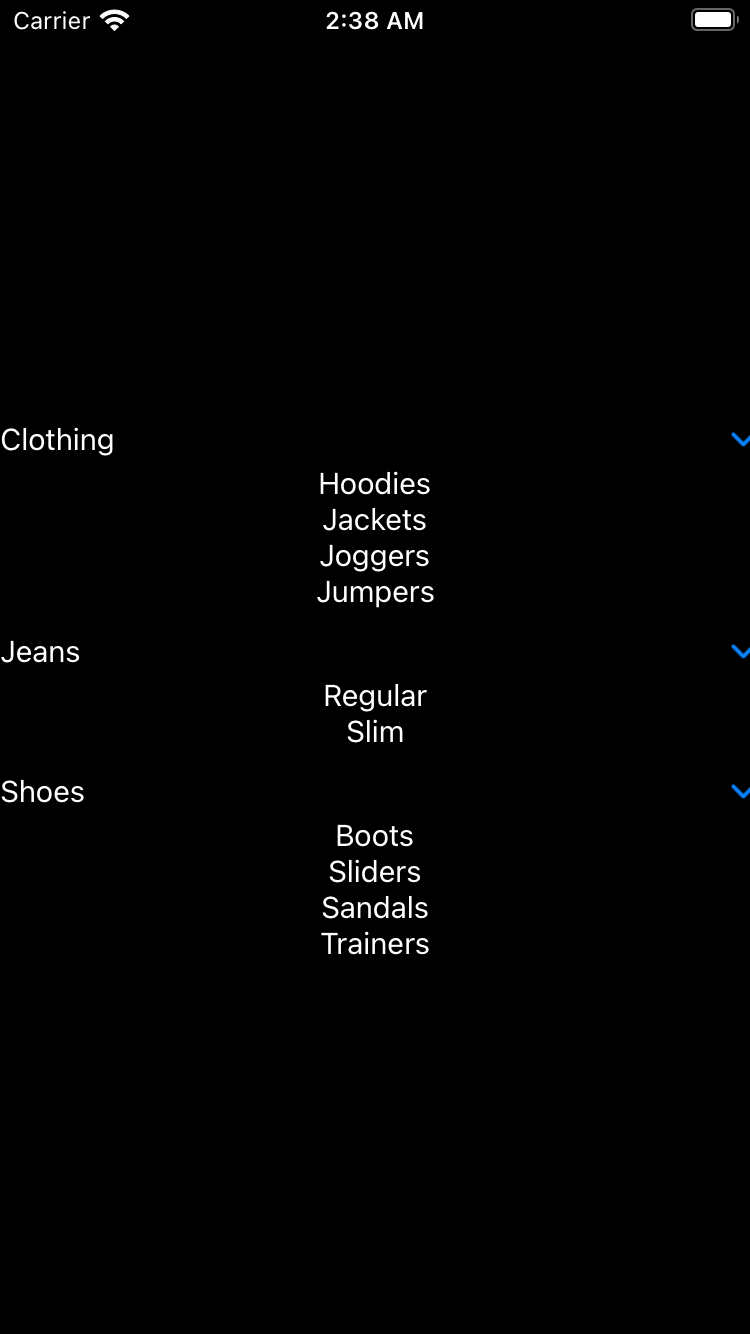
As you can see, we already have a recursive structure. Let’s try to feed it into the OutlineGroup to display the tree hierarchy.
struct ContentView: View {
    var body: some View {
        OutlineGroup(categories, id: \.value, children: \.children) { tree in
            Text(tree.value).font(.subheadline)
        }
    }
}
OutlineGroup allows us to display very complex tree-structured collections in a few lines of code. We construct OutlineGroup in a very familiar fashion. It looks similar to the ForEach view but also needs the children parameter. Children parameter is a KeyPath to a recursive property of our structure. Keep in mind that the recursive property must be optional. This is how OutlineGroup understands the end of the tree node.
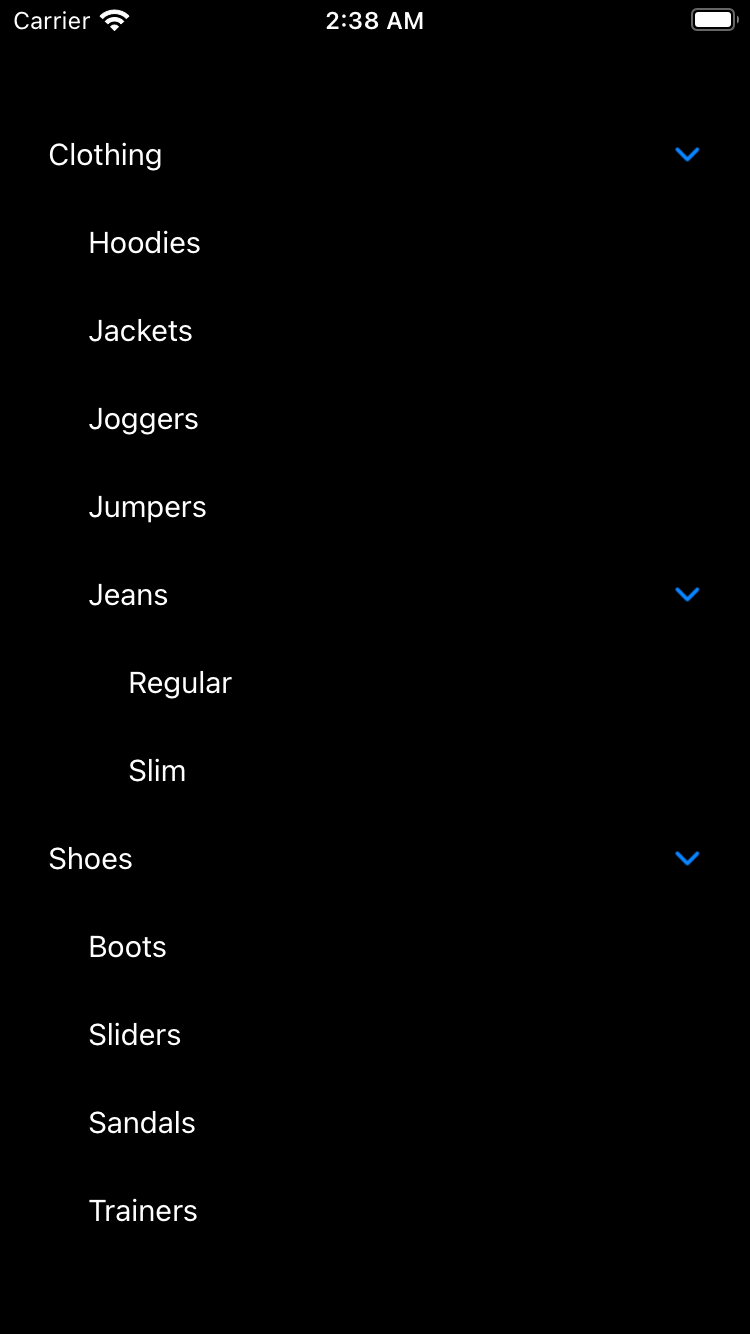
Another thing that Apple released side-by-side with OutlineGroup is a new way to configure a List that uses OutlineGroup to display its items. It automatically applies list styling to OutlineGroup and allows us to use it in the sidebar navigation. Let’s take a look at how we can use List with OutlineGroup under the hood.
struct ContentView: View {
    var body: some View {
        List(categories, id: \.value, children: \.children) { tree in
            Text(tree.value).font(.subheadline)
        }.listStyle(SidebarListStyle())
    }
}
As you can see, there is a new List initializer that takes additional children parameter. You can simply replace your OutlineGroup with List, and you will get a list styling for your tree-structured collection.
To learn more about building three-column navigation in SwiftUI, take a look at my “Sidebar navigation in SwiftUI” post.
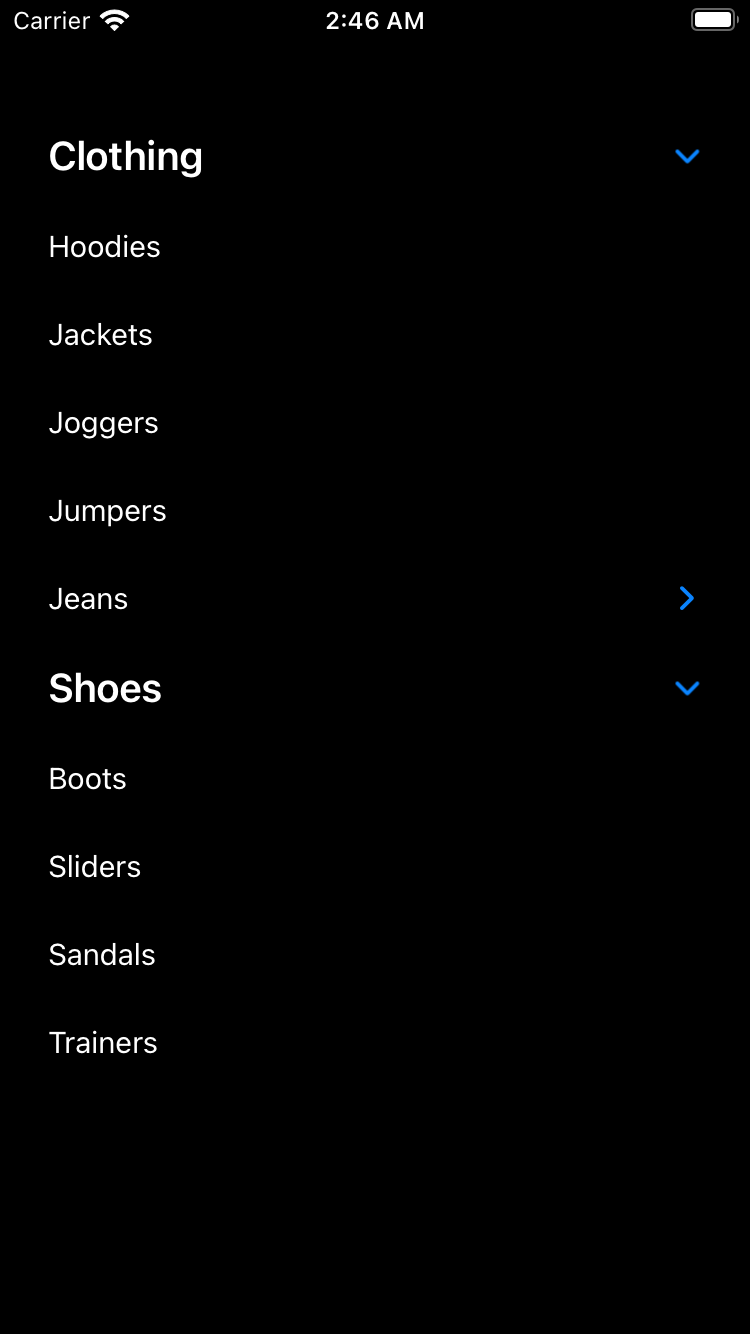
OutlineGroup is really shining when you use it inside a List. We can use OutlineGroup inside sections. This approach allows us to expand the first level of your tree-structured collection automatically. It looks gorgeous with sidebar style. Let’s take a look at the quick example of section-based OutlineGroup usage.
struct ContentView: View {
    var body: some View {
        List {
            ForEach(categories, id: \.self) { section in
                Section(header: Text(section.value)) {
                    OutlineGroup(
                        section.children ?? [],
                        id: \.value,
                        children: \.children
                    ) { tree in
                        Text(tree.value)
                            .font(.subheadline)
                    }
                }
            }
        }.listStyle(SidebarListStyle())
    }
}
DisclosureGroup
As you can see on the screenshots that I provide during the post, the main component of OutlineGroup is an expandable view called DisclosureGroup. DisclosureGroup is a straightforward view that accepts title string, content view, and boolean binding, which shows or hides the content.
struct ContentView: View {
    @State private var showContent = false

    var body: some View {
        DisclosureGroup("Message", isExpanded: $showContent) {
            Text("Hello World!")
        }
    }
}
You can use DisclosureGroup inside a Form view that allows you to build complex forms quickly in a very declarative way.
To learn more about the power of Form view in SwiftUI, take a look at my “Building forms with SwiftUI” post.
Conclusion
Today we learned about another view that WWDC20 brings us in addition to the current collection of views. With the help of OutlineGroup, we can easily display the massive collection of tree-structured items.
We also learned about DisclosureGroup that powers OutlineGroup. The nice bonus is that we can use DisclosureGroup separately. I hope you enjoy the post. Feel free to follow me on Twitter and ask your questions related to this article. Thanks for reading, and see you next week!