Activities and attachments in the XCTest framework
Today I want to continue the topic of UI testing in Swift by covering another great set of tools the XCTest framework provides us. I love UI testing and protecting the primary user flows in my app. This week we will talk about the hidden gems of the XCTest framework, which are activities and attachments.
Compare designs, show rulers, add a grid, quick actions for recent builds. Create recordings with touches & audio, trim and export them into MP4 or GIF and share them anywhere using drag & drop. Add bezels to screenshots and videos. Try now
Activity
Let’s start with the concept of the XCTest activity. When you run a UI test in the Report navigator section of the Xcode, you can find the log of every action you run in the particular UI test.
final class UITests: XCTestCase {
    var app: XCUIApplication!

    override func setUp() {
        continueAfterFailure = false
        app = XCUIApplication()
        app.launch()
    }

    func testFoodLoggingFlow() {
        goToSearch()
        search(query: "Pasta")
        chooseFirstFoodItem()
        logSelectedFood()
    }
}
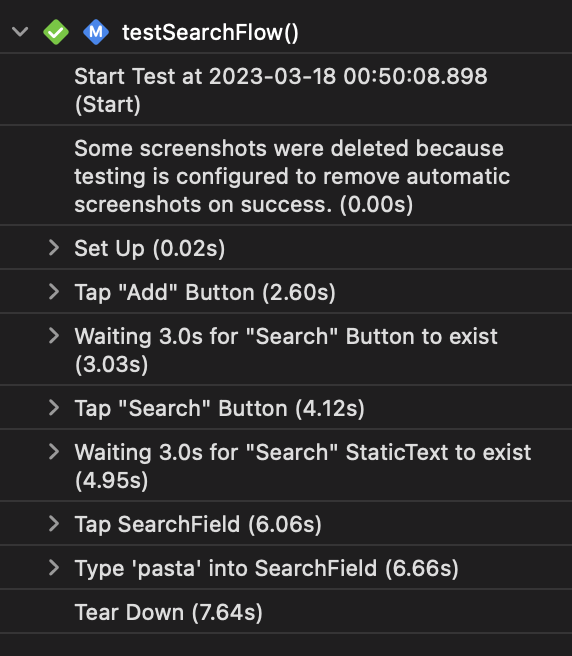
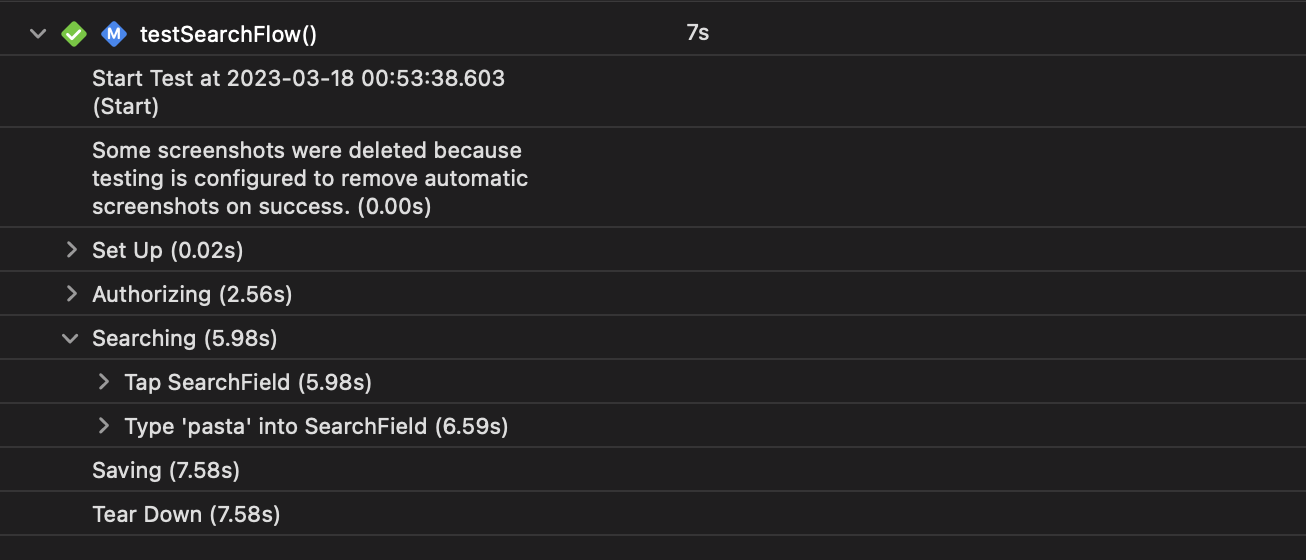
It is excellent that Xcode logs every action, and we can review them later, but it is hard to understand who is who here. And for this particular case, we can use XCTest activities. An XCTest activity allows us to group and name a set of actions inside the test. Let’s take a look at how we can use this API.
final class UITests: XCTestCase {
    var app: XCUIApplication!

    override func setUp() {
        continueAfterFailure = false
        app = XCUIApplication()
        app.launch()
    }

    func testFoodLoggingFlow() {
        XCTContext.runActivity(named: "Search") { _ in
            goToSearch()
            search(query: "Pasta")
        }

        XCTContext.runActivity(named: "Saving") { _ in
            chooseFirstFoodItem()
            logSelectedFood()
        }
    }
}
As you can see in the example above, we use the runActivity function on the XCTContext type. This function accepts two parameters: the name of the activity and the closure defining the activity. It allows us to easily group and name actions in the test and review them in the report navigator much more easily.
Attachment
The second great feature of the XCTest framework is the concept of attachments. You can add attachments to any test case or activity. For example, it might be a screenshot of the current state of your app while running a particular action. Let’s see how we can use the XCTest activity to add some screenshots.
protocol Screen {
    var app: XCUIApplication { get }
}

extension Screen {
    func takeScreenshot() {
        XCTContext.runActivity(named: "Screenshot") { activity in
            let screenshot = app.screenshot()
            let attachment = XCTAttachment(screenshot: screenshot)
            attachment.lifetime = .keepAlways
            activity.add(attachment)
        }
    }
}
As you can see in the example above, we use the XCTContext to run an activity and use the add function on the XCTActivity type to attach the screenshot. But keep in mind that the XCTAttachment type allows us to attach screenshots and any instance of String and Data types or the content of a file.
struct FeedScreen: Screen {
    let app: XCUIApplication

    func goToSearch() -> SearchScreen {
        app.buttons["Add"].firstMatch.tap()
        XCTAssertTrue(app.buttons["Search"].waitForExistence(timeout: 3))
        app.buttons["Search"].tap()
        XCTAssertTrue(app.navigationBars.staticTexts["Search"].waitForExistence(timeout: 3))
        takeScreenshot()
        return SearchScreen(app: app)
    }
}

struct SearchScreen: Screen {
    let app: XCUIApplication

    func search(query: String) -> Self {
        app.searchFields.firstMatch.tap()
        app.searchFields.firstMatch.typeText("pasta")
        takeScreenshot()
        return self
    }

    func verifyResults(contain text: String) -> Self {
        let cell = app.collectionViews.cells.element(boundBy: 0)
        XCTAssertTrue(cell.waitForExistence(timeout: 3))
        XCTAssertTrue(cell.accessibilityValue?.contains(text) ?? false)
        return self
    }
}
I’m a big fan of the Page Object pattern and build my UI tests suite using it. I define the Screen protocol that every Page Object in my app conforms to. It contains many useful functions, one of which is the takeScreenshot function.
To learn about the Page Object pattern I’ve used in the example above, take a look at my “UI Testing using Page Object pattern in Swift” post.
import XCTest

final class UITests: XCTestCase {
    var app: XCUIApplication!

    override func setUp() {
        continueAfterFailure = false
        app = XCUIApplication()
        app.launch()
    }

    func testSearchFlow() {
        FeedScreen(app: app)
            .goToSearch()
            .search(query: "Pasta")
            .verifyResults(contain: "PASTA")
    }
}
And finally, we can review and save all of these attachments in the Report navigator section of the Xcode. It allows us to do many exciting things. For example, you can run a UI tests suite that goes through the main flows of your app and collects screenshots for the App Store page. And you can run it under different locales to automate collecting app screenshots.

I hope you enjoy the post. Feel free to follow me on Twitter and ask your questions related to this post. Thanks for reading, and see you next week!