Building calendar without UICollectionView in SwiftUI
One of the most expected features of SwiftUI 2.0 is a SwiftUI alternative to UICollectionView. UICollectionView provides us an easy way to build super custom interfaces like calendar or photos grid. But today, I want to show you that we can create a calendar view without UICollectionView by using only pure SwiftUI.
Let’s start by describing what we want to achieve with our calendar view. The calendar view is a container view that displays its child views using a calendar-based grid. These are my requirements for a calendar view:
- It should scroll vertically through months.
- It should respect to calendar settings that the user has on the device.
- It should provide a nice API to build custom day cells.
OK, now we have the list of requirements for our component. We can start coding.
struct CalendarView<DateView>: View where DateView: View {
    let interval: DateInterval
    let content: (Date) -> DateView

    init(
        interval: DateInterval,
        @ViewBuilder content: @escaping (Date) -> DateView
    ) {
        self.interval = interval
        self.content = content
    }
}
Here we define our CalendarView struct that accepts date interval in which it needs to display dates and a @ViewBuilder closure that we will use to build day cells.
ViewBuilder is a great way to extract view construction logic and provide a DSL like syntax. I already talked about @ViewBuilder function builder on my blog multiple times. To learn more, take a look at my “The power of @ViewBuilder in SwiftUI” post.
struct CalendarView<DateView>: View where DateView: View {
    @Environment(\.calendar) var calendar

    let interval: DateInterval
    let content: (Date) -> DateView

    init(
        interval: DateInterval,
        @ViewBuilder content: @escaping (Date) -> DateView
    ) {
        self.interval = interval
        self.content = content
    }

    private var months: [Date] {
        calendar.generateDates(
            inside: interval,
            matching: DateComponents(day: 1, hour: 0, minute: 0, second: 0)
        )
    }

    var body: some View {
        ScrollView(.vertical, showsIndicators: false) {
            VStack {
                ForEach(months, id: \.self) { month in
                    MonthView(month: month, content: self.content)
                }
            }
        }
    }
}
Now we can display a scroll view that has a vertical stack as its root view. We use a calendar to generate all months in the date interval that the user provides us. As you can see, we use a system calendar that SwiftUI put in the environment. SwiftUI will also update the view as soon as the user changes the calendar in system settings.
As I said before, the environment is one of my favorite features of SwiftUI. To learn more about the environment feature, take a look at my “The power of Environment in SwiftUI” post.
As you can see, I decided to create the separated MonthView struct that displays a single month in our calendar view. SwiftUI allows us to compose multiple views to build an excellent view hierarchy. I want to note that I reuse MonthView in other parts of my app to present a calendar preview.
struct MonthView<DateView>: View where DateView: View {
    @Environment(\.calendar) var calendar

    let month: Date
    let content: (Date) -> DateView

    init(
        month: Date,
        @ViewBuilder content: @escaping (Date) -> DateView
    ) {
        self.month = month
        self.content = content
    }

    private var weeks: [Date] {
        guard
            let monthInterval = calendar.dateInterval(of: .month, for: month)
            else { return [] }
        return calendar.generateDates(
            inside: monthInterval,
            matching: DateComponents(hour: 0, minute: 0, second: 0, weekday: calendar.firstWeekday)
        )
    }

    var body: some View {
        VStack {
            ForEach(weeks, id: \.self) { week in
                WeekView(week: week, content: self.content)
            }
        }
    }
}
As you can see in the code example above, MonthView struct is a plain view that uses the system provided calendar to generate weeks and render them using a vertical stack with a collection of week views.
struct WeekView<DateView>: View where DateView: View {
    @Environment(\.calendar) var calendar

    let week: Date
    let content: (Date) -> DateView

    init(
        week: Date,
        @ViewBuilder content: @escaping (Date) -> DateView
    ) {
        self.week = week
        self.content = content
    }

    private var days: [Date] {
        guard
            let weekInterval = calendar.dateInterval(of: .weekOfYear, for: week)
            else { return [] }
        return calendar.generateDates(
            inside: weekInterval,
            matching: DateComponents(hour: 0, minute: 0, second: 0)
        )
    }

    var body: some View {
        HStack {
            ForEach(days, id: \.self) { date in
                HStack {
                    if self.calendar.isDate(self.week, equalTo: date, toGranularity: .month) {
                        self.content(date)
                    } else {
                        self.content(date).hidden()
                    }
                }
            }
        }
    }
}
Week view is the latest piece of my calendar view. It also uses the system provided calendar to generate days inside the given week and renders them using a horizontal stack by applying passed @ViewBuilder closure to construct a view per day.
struct RootView: View {
    @Environment(\.calendar) var calendar

    private var year: DateInterval {
        calendar.dateInterval(of: .year, for: Date())!
    }

    var body: some View {
        CalendarView(interval: year) { date in
            Text("30")
                .hidden()
                .padding(8)
                .background(Color.blue)
                .clipShape(Circle())
                .padding(.vertical, 4)
                .overlay(
                    Text(String(self.calendar.component(.day, from: date)))
                )
        }
    }
}
In the example above, you see how we can use our calendar view. I want you to pay attention to the way that I use to construct a day view. I call it template view. I create a hidden text with the template value that has the maximal width. Then I show the real content as the overlay of the template view. This approach allows me to have day views of the same size. We can use the frame modifier instead, but in this case, we will break dynamic type support by limiting the space.
To learn more about benefits of view composition, take a look at my “View composition in SwiftUI” post.
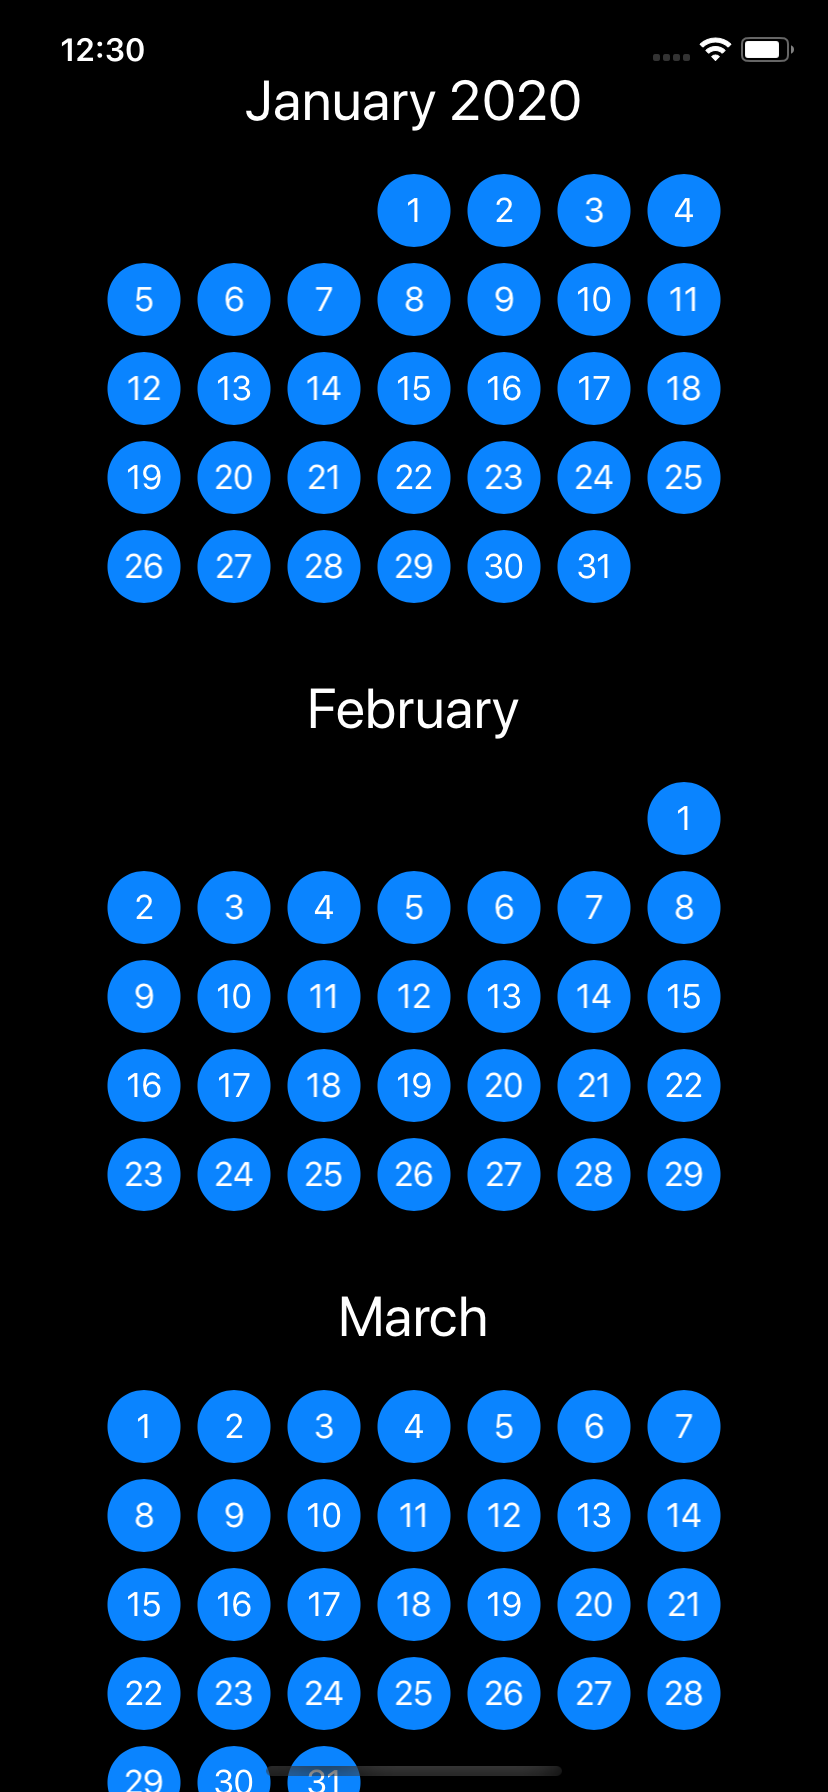
Here is the final result of our work. I think it looks nice, and I will use it in my next app. You can access full source code via Github Gist.
Conclusion
I still think that we will have a UICollectionView alternative later this year. But I need to mention that SwiftUI has such a friendly layout system that we can use to build great views. I hope you enjoy the post. Feel free to follow me on Twitter and ask your questions related to this post. Thanks for reading, and see you next week!