Commands in SwiftUI
This week we will talk about another new API that Apple released this year during WWDC 20. Replacing AppDelegate with the new SwiftUI App Lifecycle brings us tons of new APIs that we can use to replace old functionality with a brand new declarative API. One of those APIs is commands, which we will cover today.
Commands are realized in different ways on different platforms. The main menu uses the available command menus and groups to organize its main menu items on macOS. Each menu is represented as a top-level menu bar menu. Each command group has a corresponding set of menu items in one of the top-level menus, delimited by separator menu items.
On iPadOS, commands with keyboard shortcuts are exposed in the shortcut discoverability HUD that users see when they hold down the Command key.
To learn more about implementing keyboard shortcuts, take a look at my “Keyboard shortcuts in SwiftUI” post.
@main
struct TestProjectApp: App {
    var body: some Scene {
        WindowGroup {
            ContentView()
        }.commands {
            CommandMenu("First menu") {
                Button("Print message") {
                    print("Hello World!")
                }.keyboardShortcut("p")
            }
        }
    }
}

As you can see in the example above, you can attach the commands modifier to any scene in your app and provide a CommandBuilder closure. CommandBuilder is a function builder like ViewBuilder, but instead of views, it builds commands. You can use primitive command types provided by SwiftUI to compose them together and build your own unique main menu experience.
A scene is a part of an app’s user interface with a lifecycle managed by the system. To learn more take a look at my “Managing scenes in SwiftUI” post.
CommandMenu is a primitive command type that accepts a title for your menu item and a ViewBuilder closure that will be used to build menu items. You can use Button, Picker, Divider, Toggle, and other SwiftUI views to build your command view hierarchy.
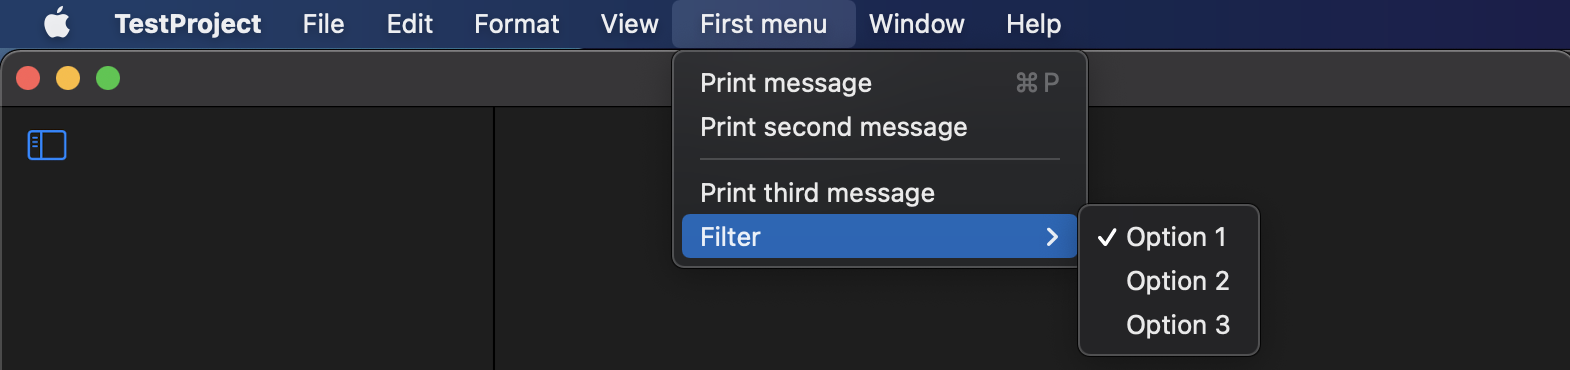
@main
struct TestProjectApp: App {
    @State private var filter = 1

    var body: some Scene {
        WindowGroup {
            ContentView()
        }.commands {
            CommandMenu("First menu") {
                Button("Print message") {
                    print("Hello World!")
                }.keyboardShortcut("p")

                Button("Print second message") {
                    print("Second message!")
                }

                Divider()

                Button("Print third message") {
                    print("Third message!")
                }

                Picker(selection: $filter, label: Text("Filter")) {
                    Text("Option 1").tag(1)
                    Text("Option 2").tag(2)
                    Text("Option 3").tag(3)
                }
            }
        }
    }
}
There can be some situations where you need to reuse command types. You can do that by defining your own commands type by conforming to Commands protocol. This approach allows you to reuse your commands.
struct SortingCommands: Commands {
    @Binding var sorting: Int

    var body: some Commands {
        CommandMenu("Sort") {
            Picker(selection: $sorting, label: Text("Sorting")) {
                Text("Option 1").tag(1)
                Text("Option 2").tag(2)
                Text("Option 3").tag(3)
            }
        }
    }
}

@main
struct MyApp: App {
    @State private var sorting = 1

    var body: some Scene {
        WindowGroup {
            ContentView()
        }.commands {
            SortingCommands(sorting: $sorting)
        }
    }
}
Now we know how to create new command menus. What if we need to add the menu item to the existing system provided menu or replace it. For this particular case, SwiftUI provides us CommandGroup type, which allows us to insert new command items before, after or even replace the system provided item. Let’s see how we can use it.
@main
struct TestProjectApp: App {
    var body: some Scene {
        WindowGroup {
            ContentView()
        }.commands {
            CommandGroup(before: CommandGroupPlacement.newItem) {
                Button("before item") {
                    print("before item")
                }
            }

            CommandGroup(replacing: CommandGroupPlacement.appInfo) {
                Button("Custom app info") {
                    // show custom app info
                }
            }

            CommandGroup(after: CommandGroupPlacement.newItem) {
                Button("after item") {
                    print("after item")
                }
            }
        }
    }
}

As you can see in the example above, we create CommandGroup and pass it a CommandGroupPlacement, which will be used as an anchor point for inserted or replaced items. CommandGroupPlacement provides us with many system command locations like newItem, saveItem, printItem, undoRedo, pasteboard, windowArrangement, help, etc.
SwiftUI also provides us a few ready to use commands for searching, editing and transforming text that you can enable by using commands modifier and attaching it to any scene you need.
@main
struct TestProjectApp: App {
    var body: some Scene {
        WindowGroup {
            ContentView()
        }.commands {
            TextEditingCommands()
            TextFormattingCommands()
        }
    }
}
Conclusion
This week, we learned about another new declarative API that SwiftUI provides to build your macOS app’s main menu. I hope you enjoy this declarative API that allows us to maintain a single codebase for different platforms. Feel free to follow me on Twitter and ask your questions related to this article. Thanks for reading, and see you next week!