Mastering SwiftUI previews
This week, I want to talk about one of the most powerful Xcode features, SwiftUI previews. SwiftUI previews allow you to look at your SwiftUI views inside Xcode without running the app in the simulator. You can also preview UIKit views and controllers by wrapping them in SwiftUI. Today we will learn about all the powerful features of previews in Xcode.
Compare designs, show rulers, add a grid, quick actions for recent builds. Create recordings with touches & audio, trim and export them into MP4 or GIF and share them anywhere using drag & drop. Add bezels to screenshots and videos. Try now
Basics
Xcode monitors your Swift files, and as soon as your Swift file contains the struct that conforms to PreviewProvider protocol, it shows you the preview canvas. Let’s take a look at the example.
struct ContentView: View {
    var body: some View {
        Text("Hello World!")
    }
}

struct ContentView_Previews: PreviewProvider {
    static var previews: some View {
        ContentView()
    }
}
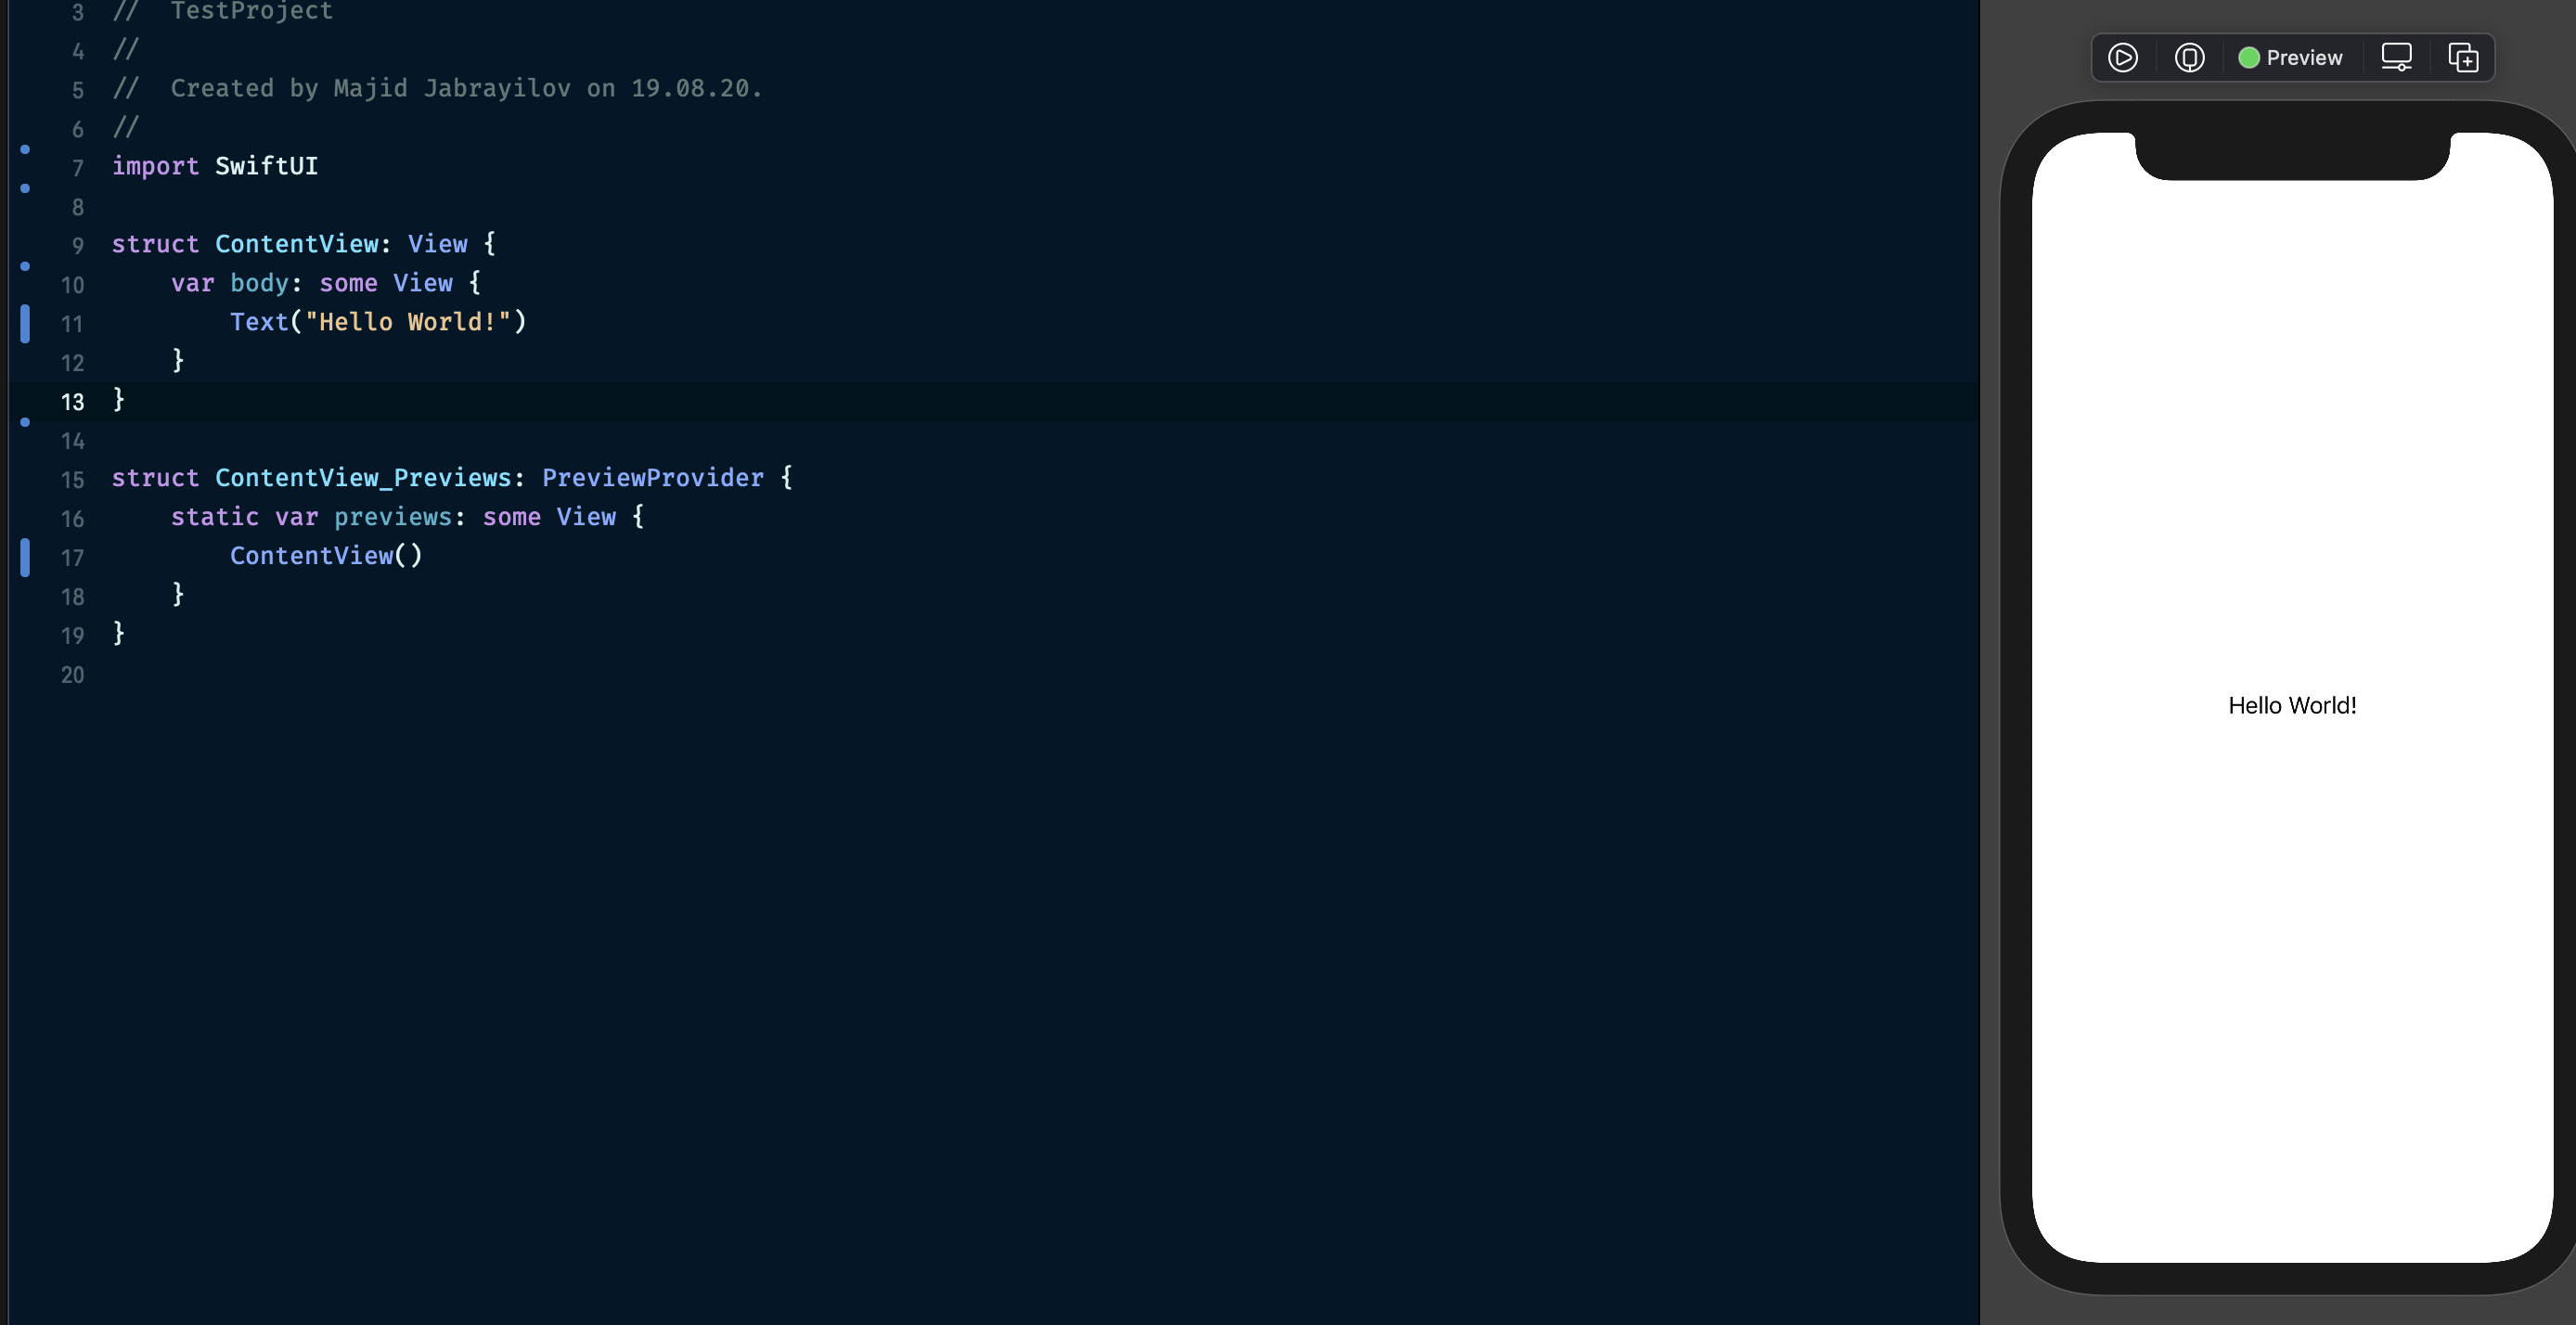
We declare the ContentView_Previews struct that conforms to PreviewProvider protocol. The only requirement of PreviewProvider protocol is the static previews calculated property. In this property, you should return the view that you want to preview. You can preview more than one view by placing them in previews property.
struct ContentView_Previews: PreviewProvider {
    static var previews: some View {
        ContentView()
            .preferredColorScheme(.dark)
        ContentView()
            .preferredColorScheme(.light)
    }
}
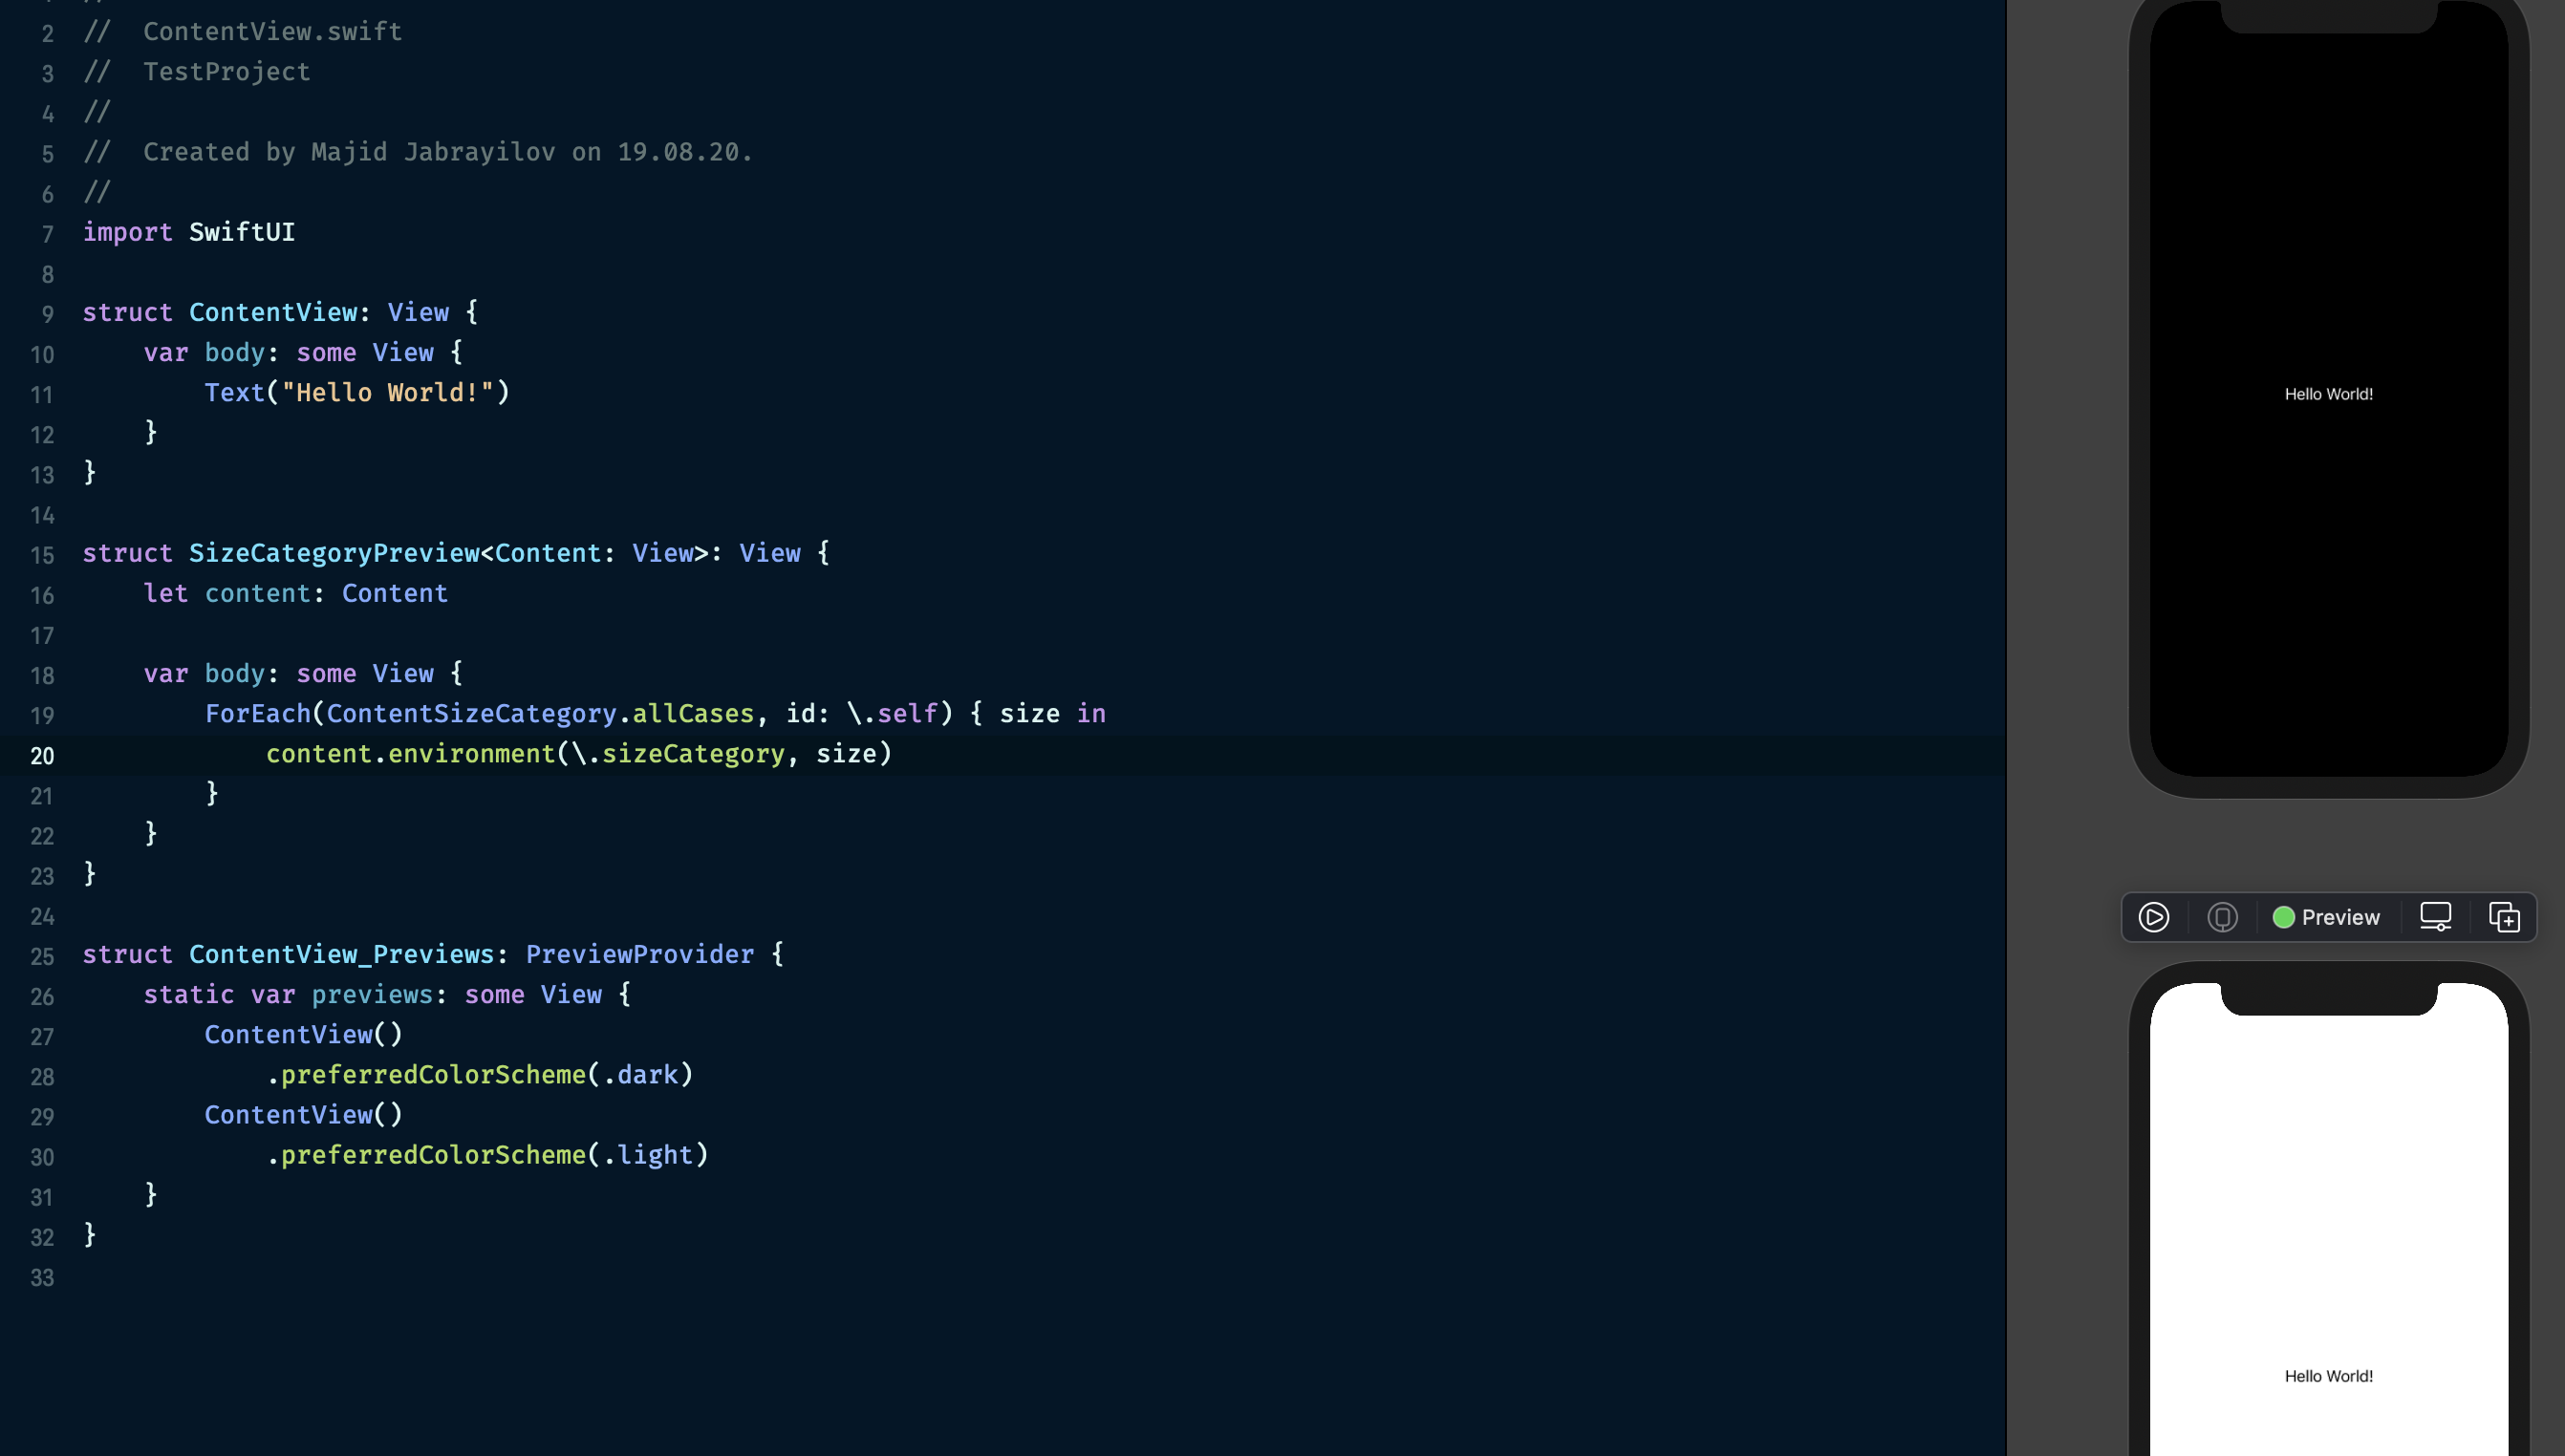
Environment
Preview is a simple SwiftUI view. You can apply different modifiers in previews to check how your view looks with various user settings. One of the essential things is Dynamic Type support. You can easily verify your view with different font size options.
struct ContentView_Previews: PreviewProvider {
    static var previews: some View {
        ContentView()
            .environment(\.sizeCategory, .extraLarge)
    }
}
As you can see in the example above, we can apply the environment modifier in our previews to check the view’s look and feel with different font sizes. I’m doing this very often in my projects. That’s why I create a special view which automates this process.
To learn more about providing custom values via SwiftUI’s Environment, take a look at my “The power of Environment in SwiftUI” post.
struct SizeCategoryPreview<Content: View>: View {
    let content: Content

    var body: some View {
        ForEach(ContentSizeCategory.allCases, id: \.self) { size in
            content.environment(\.sizeCategory, size)
        }
    }
}
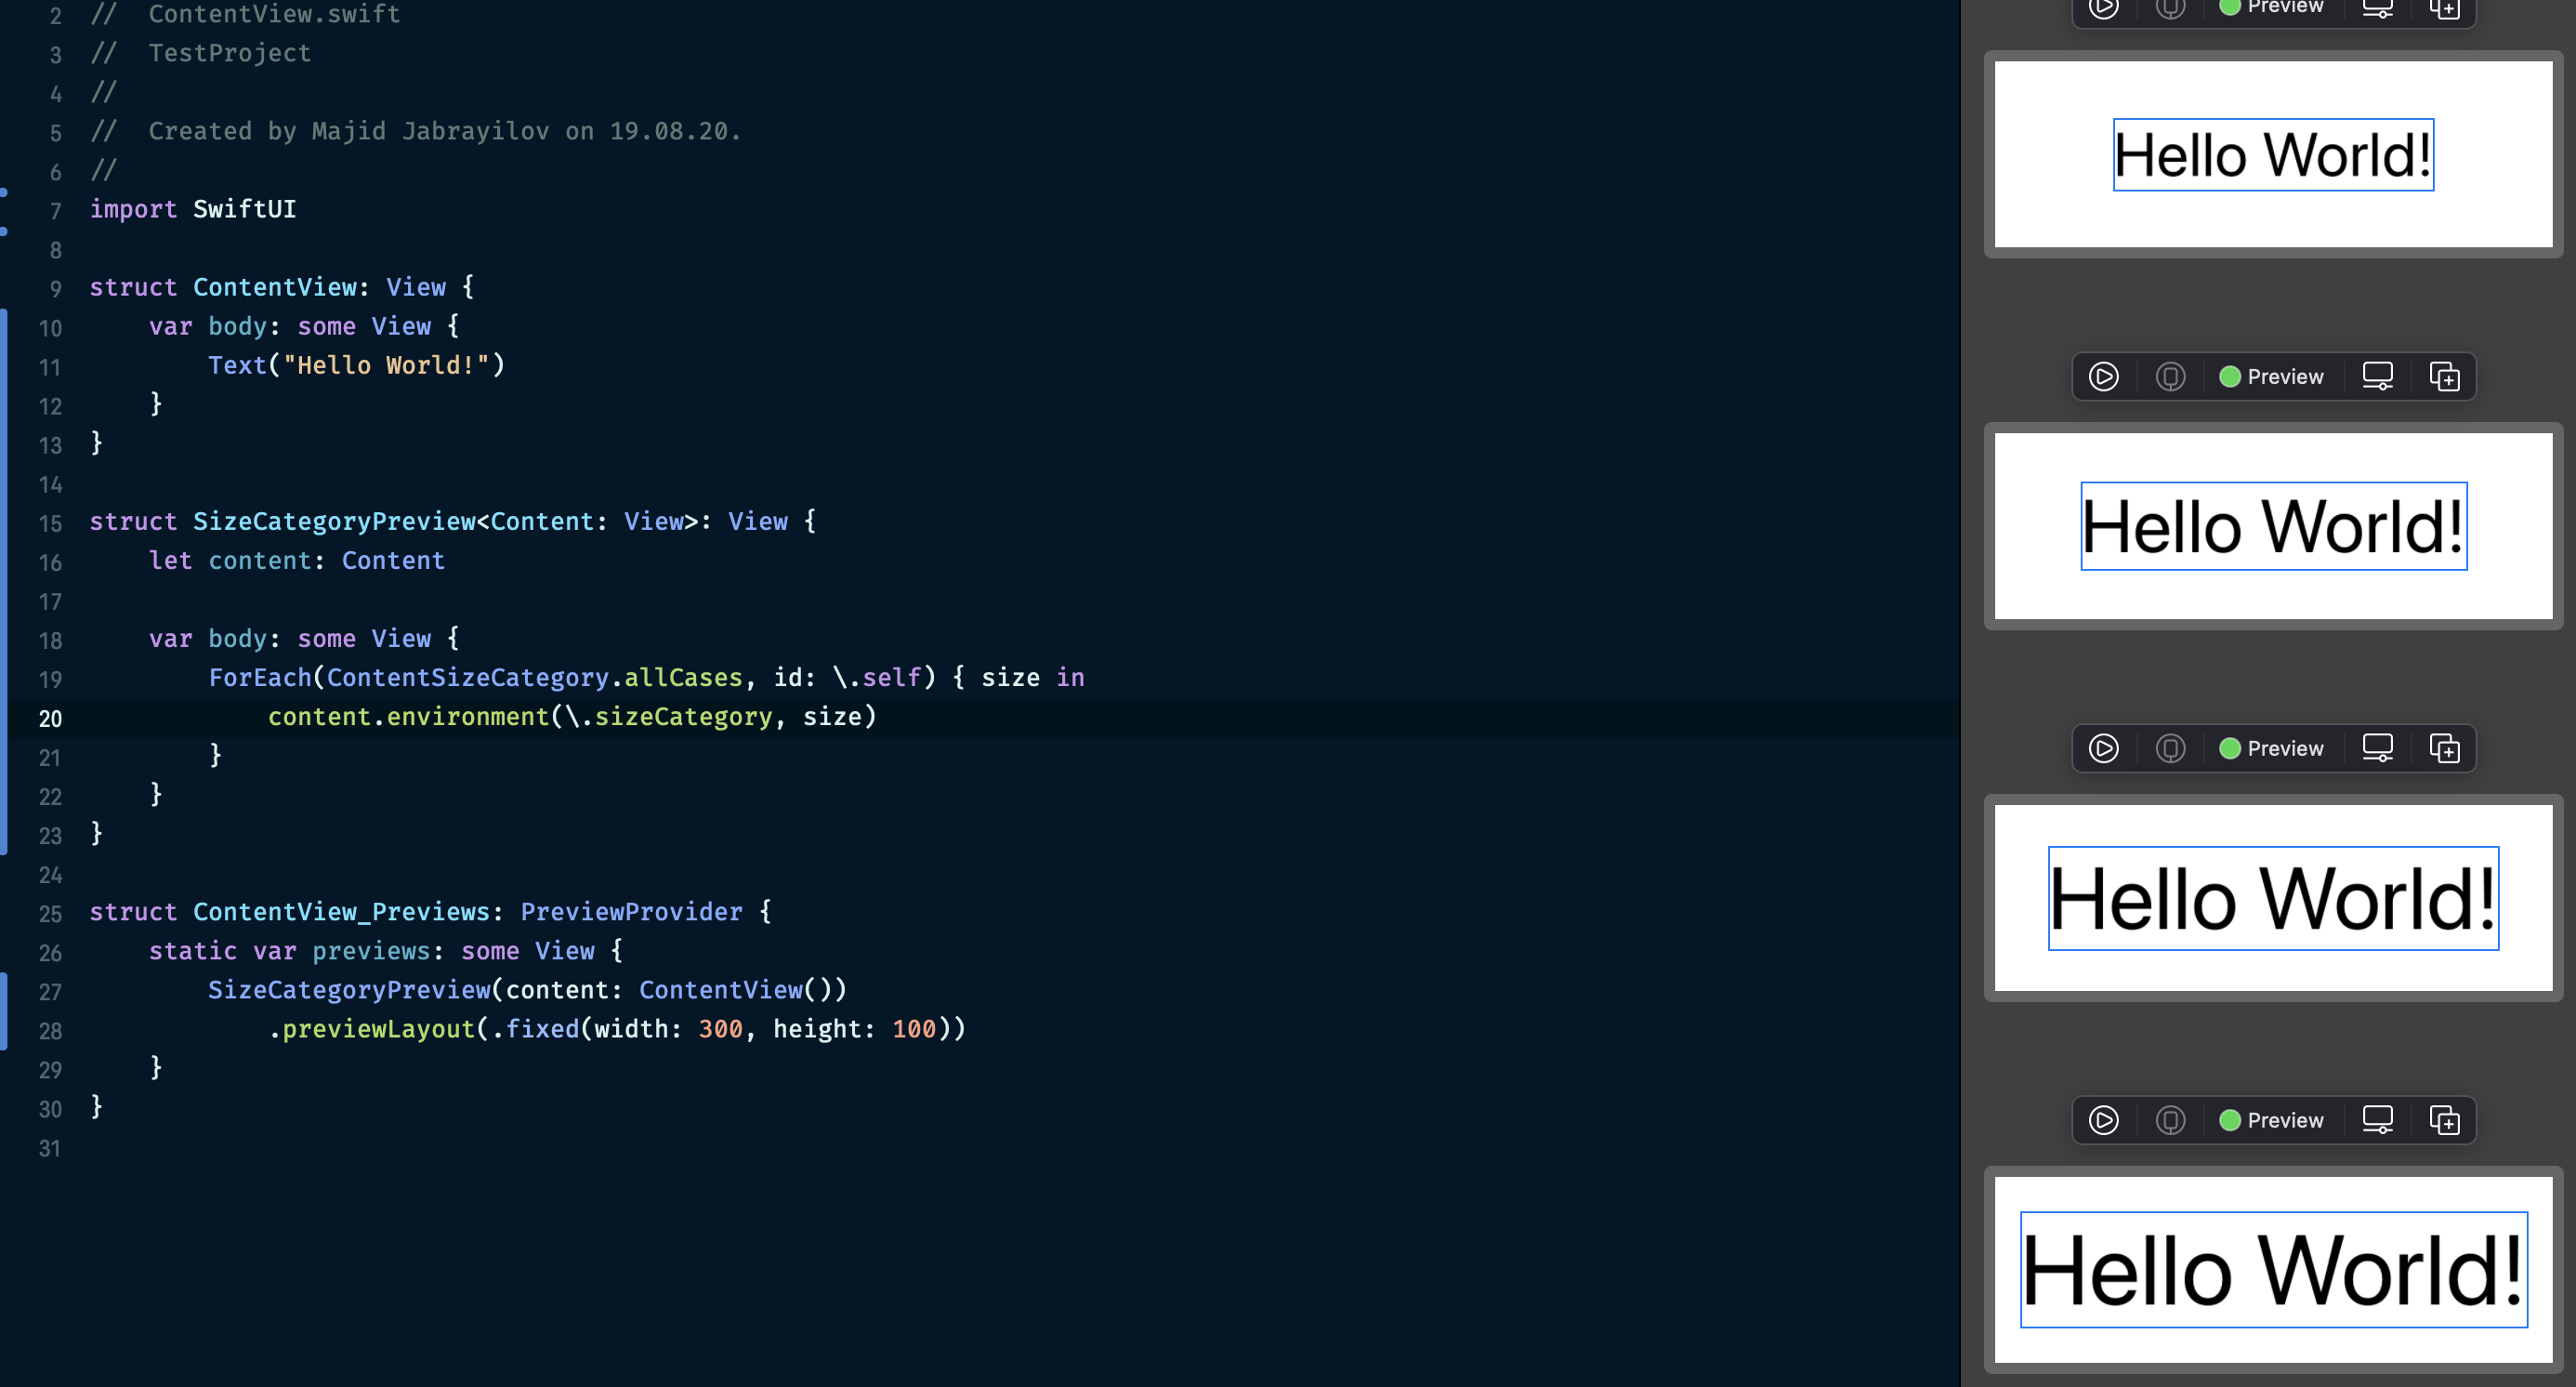
Here we declare the SizeCategoryPreview struct, a SwiftUI view accepting another view and putting it in a loop by applying different content size conditions. It allows you to validate the look and feel of your view in all possible size categories.
struct ContentView_Previews: PreviewProvider {
    static var previews: some View {
        SizeCategoryPreview(content: ContentView())
    }
}
UIKit previews
Xcode previews are not limited to SwiftUI views. You can quickly wrap any UIKit view or controller with a struct conforming to UIViewRepresentable or UIViewControllerRepresentable and preview it.
To learn more about using UIKit view and controllers in SwiftUI, look at my “Using UIKit views in SwiftUI” post.
struct UIKitPreview: UIViewRepresentable {
    typealias UIViewType = UIView

    let view: UIViewType

    func makeUIView(context: Context) -> UIViewType {
        view
    }

    func updateUIView(_ uiView: UIViewType, context: Context) {

    }
}
Here we create a generic struct that allows us to preview any UIKit view in Xcode previews. We need to create a UIKit view, wrap it with UIKitPreview struct and return it in previews property. By doing that, you can preview any UIKit view in Xcode previews.
struct ContentView_Previews: PreviewProvider {
    static var previews: some View {
        UIKitPreview(view: MKMapView())
    }
}
Preview files
I want to mention that you are not limited for creating a preview only inside a Swift file containing a SwiftUI view. You can create Swift files that contain only previews. It might be handy when you provide a complete design system or a UI library. For example, I maintain a SwiftUI charting library, and I have a Swift file that contains the previews of all available chart views in my library.
Don’t be afraid to extract your complex views into small pieces and then compose them into a large view. To learn more about view decomposition, look at my “View composition in SwiftUI” post.
Debug previews
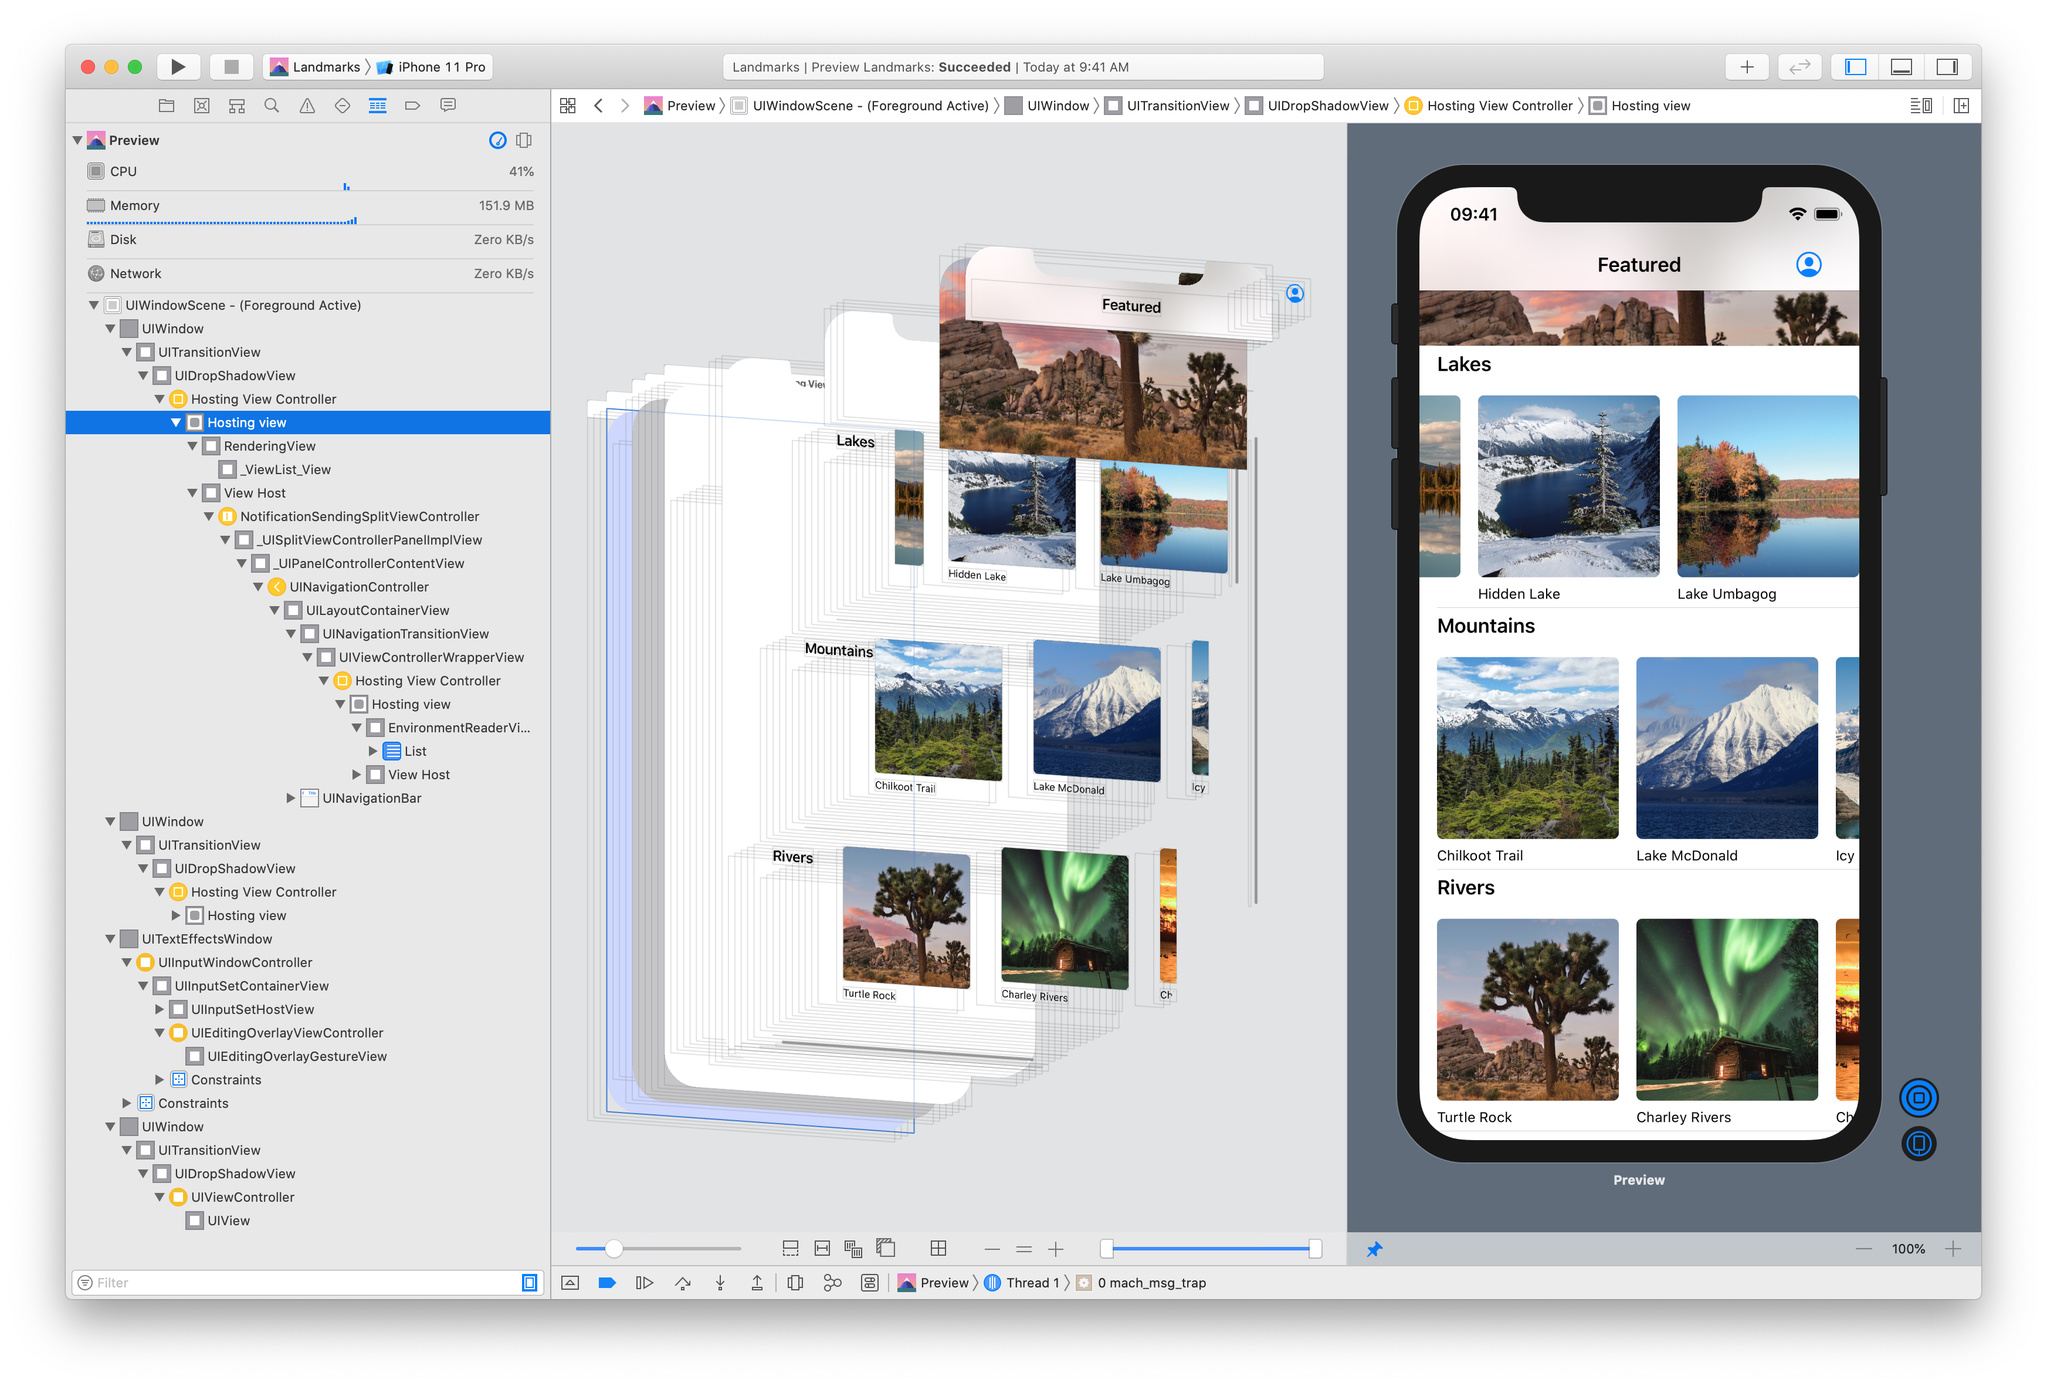
SwiftUI previews use the simulator to render themselves. So you can think about them as an embedded simulator in the Xcode window. That’s why we can run and debug SwiftUI preview directly in the Xcode canvas.
You can attach the debugger to the app running in the preview by using Debug menu -> Attach to Process and choose your app. Now you can press Debug View Hierarchy button in the toolbar on the bottom of Xcode to run visual debugger.
Shortcuts
There are two shortcuts that you should remember. Both of them will make your life easier during the development cycle of your SwiftUI views.
- Cmd + Option + Enter shows or hides previews.
- Cmd + Option + P runs the previews.
Conclusion
Xcode preview is one of my favorite features of Xcode that changed my development habits enormously. Keep your views small by using decomposition to make your previews fast and stable. I hope you enjoy the post. Feel free to follow me on Twitter and ask your questions related to this article. Thanks for reading, and see you next week!