Logging in Swift
We encounter bugs that are very hard to catch in the debugger from time to time. For example, it might occur only after a few days of app usage. In this case, running an app in a simulator and testing a feature doesn’t make sense. We need to understand what the user has done in the application and how it responds to user actions in this situation. Logging is an excellent technique to track and understand user actions through the app. This week we will learn how to implement proper logging functionality in our apps.
Writing logs
Fortunately, Apple provides us with a unified logging system to build a proper logging using the Logger type. Let’s take a look at how we can use it in code.
import Foundation
import os

@MainActor final class ProductsViewModel: ObservableObject {
    private static let logger = Logger(
        subsystem: Bundle.main.bundleIdentifier!,
        category: String(describing: ProductsViewModel.self)
    )

    @Published private(set) var products: [Product] = []

    private let service: ProducsService
    init(service: ProducsService) {
        self.service = service
    }

    func fetch() async {
        do {
            Self.logger.trace("Start product list fetching")
            products = try await service.fetch()
            Self.logger.notice("Product list fetching is finished")
        } catch {
            Self.logger.warning("\(error.localizedDescription, privacy: .public)")
        }
    }
}
As you can see in the example above, we have the ProductsViewModel fetching products from the remote server. Usually, we need only one Logger instance per feature. That’s why we declare it as a private and static constant. We can use subsystem and category parameters to filter logs in the future when we need to extract them. I usually use bundle identifier as subsystem and type name as a category. This approach allows me easily find logs from the required part of my app.
Logger type provides us with functions to log a message with different emergency levels. For example, the trace function works as debug print, and the system doesn’t store it. The warning function allows us to log errors that are not fatal for our app, but we still need to know about them.
func save(_ object: CKRecord, using container: CKContainer) async {
    do {
        let status = try await container.accountStatus()
    } catch {
        logger.critical("Can't fetch iCloud account status.")
        fatalError()
    }
}
Sometimes we want to crash our app instead of working in an inconsistent state. We can use the critical function before calling fatalError to save a meaningful error message.
Remember that the iOS system will store messages logged with notice, warning, and critical functions up to a storage limit. It doesn’t store trace messages at all.
Reading logs
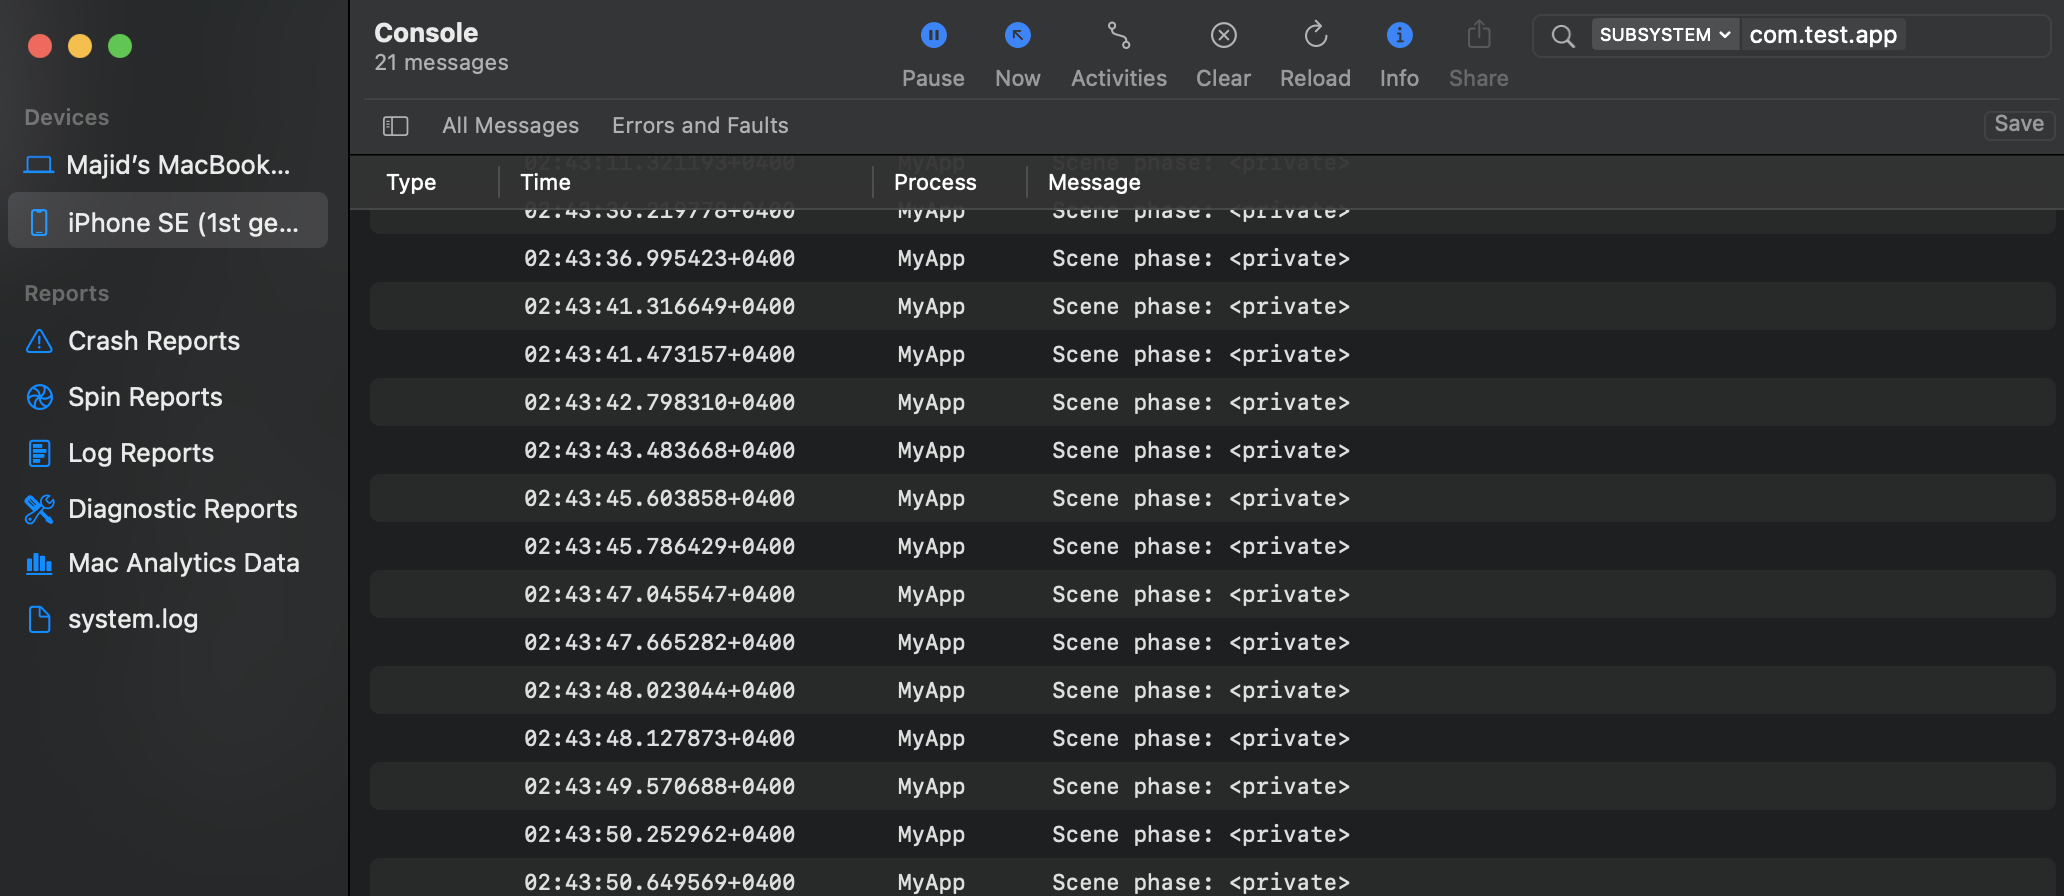
We learned how to write logs, but how can we read them? All the records appear in the Xcode’s debug console while running the app through Xcode. Another option is a device with an already running app that you can connect to your computer via cable. In this case, you can extract logs by using the Console app. The console app allows us to quickly filter subsystems and categories to focus only on required information.
import Foundation
import SwiftUI
import os

struct ContentView: View {
    @Environment(\.scenePhase) var scenePhase

    var body: some View {
        Text("Hello!")
            .onChange(of: scenePhase) { newPhase in
                logger.trace("Scene phase: \(newPhase)")
            }
    }
}
Formatting logs
As you can see in the screenshot above, the Console app hides a part of logged information. By default, the Logger type shows only static strings, and all the interpolated content is invisible for the developer. Usually, we need to see the description of the error. We should use the public as a privacy parameter to make it possible.
import Foundation
import SwiftUI
import os

struct ContentView: View {
    @State private var counter: UInt = 1_000
    @Environment(\.scenePhase)
    private var scenePhase

    var body: some View {
        Text("Hello!")
            .onChange(of: scenePhase) { newPhase in
                logger.trace("Scene phase: \(newPhase, privacy: .public)")
                logger.trace("Counter: \(counter, privacy: .private(mask: .hash))")
                logger.trace("Counter: \(counter, align: .right(columns: 10))")
                logger.trace("Counter: \(counter, format: .hex, align: .right(columns: 10))")
            }
    }
}
The Logger type uses string interpolation to provide formatting options, like aligning, hiding, and formatting values.
Conclusion
Logging errors and crucial situations in your app is vital. Today we learned how to build a proper logging flow and how we can leverage the power of the Console app to filter logged messages. I hope you enjoy the post. Feel free to follow me on Twitter and ask your questions related to this post. Thanks for reading, and see you next week!