Bottom sheet API in SwiftUI
Two years ago, I wrote a post about building a custom bottom sheet in SwiftUI. Nowadays, there is no need to make it manually, at least if you don’t need a super custom behavior. SwiftUI introduces a new API to display a bottom sheet in a few lines of code. This week we learn the new API allowing us to present bottom sheets in different appearances.
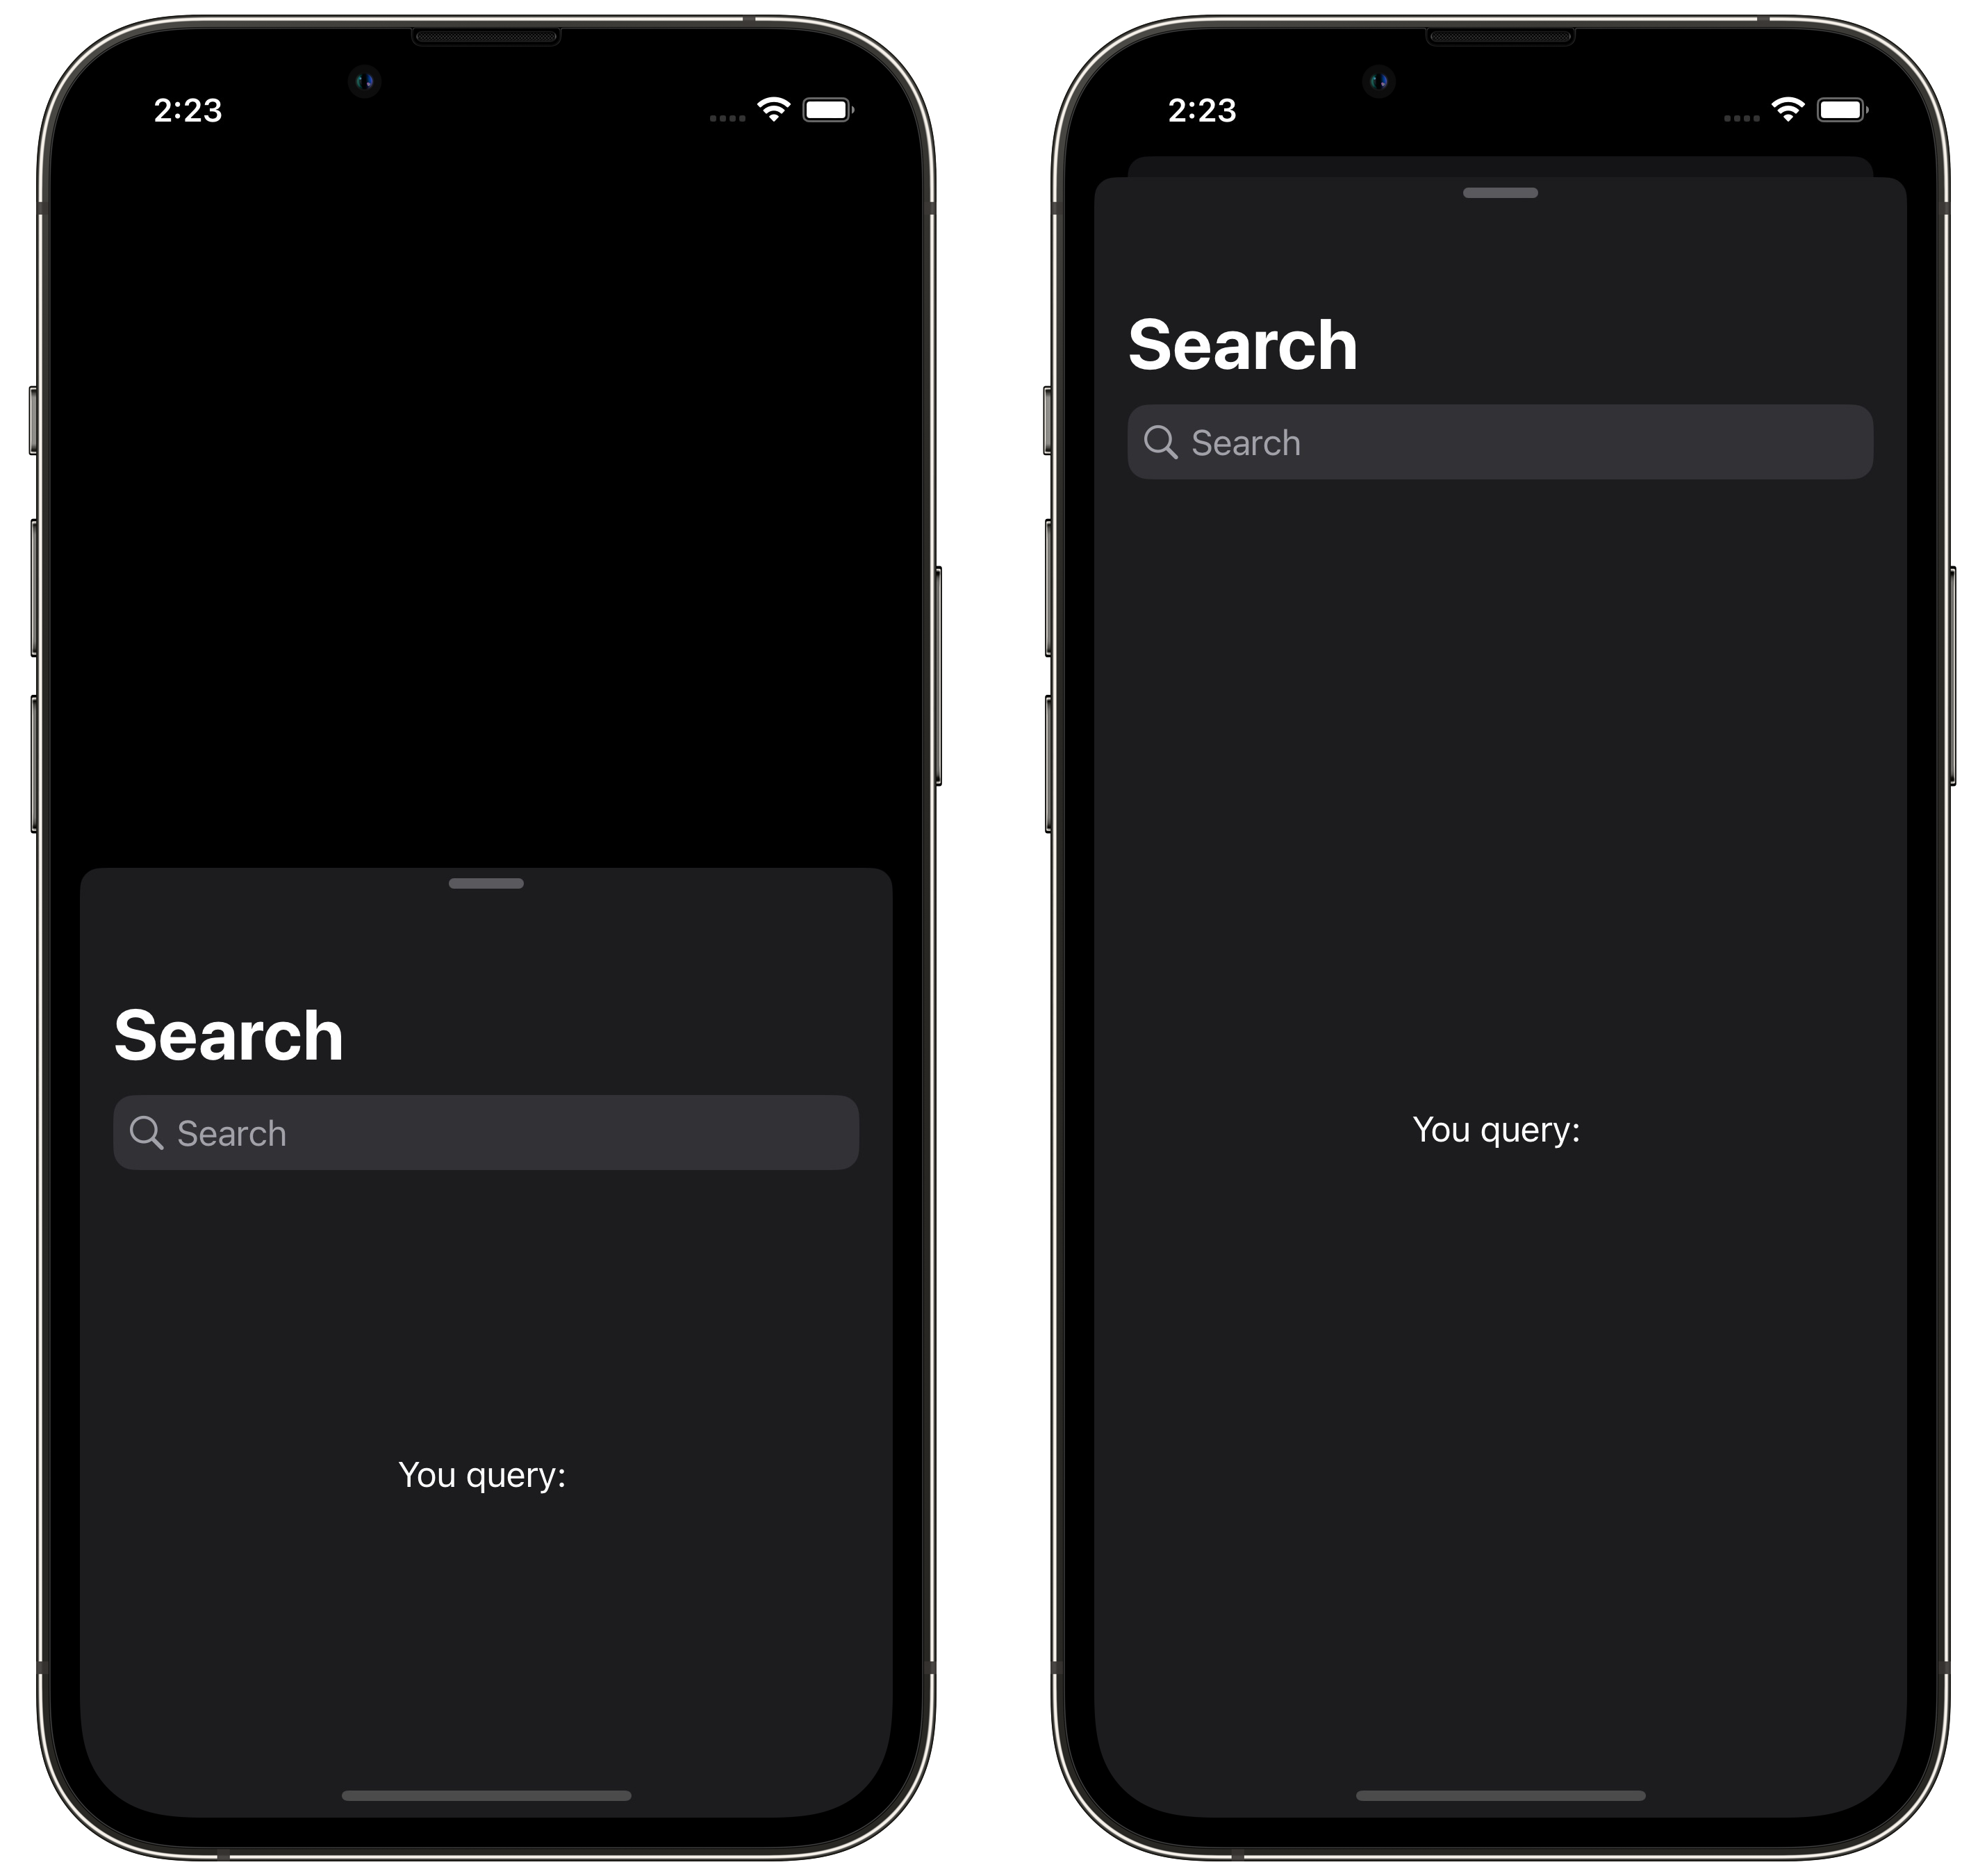
The new bottom sheet API in SwiftUI is straightforward to use. All you need to do is to attach the presentationDetents view modifier to the content of the sheet view modifier.
struct ContentView: View {
    @State private var sheetShown = false
    @State private var query = ""

    var body: some View {
        Button("Display bottom sheet") {
            sheetShown = true
        }
        .sheet(isPresented: $sheetShown) {
            NavigationStack {
                Text("You query: \(query)")
                    .searchable(text: $query)
                    .navigationTitle("Search")
            }
            .presentationDetents([.medium])
        }
    }
}
To learn how to create a bottom sheet in SwiftUI from scratch, take a look at my “Building Bottom sheet in SwiftUI” post.
As you can see in the example above, we use the presentationDetents view modifier to display a sheet as the bottom sheet. We also set the size of the bottom sheet to medium. In this case, it will take half of the screen. You can use the presentationDetents view modifier to pass an array of available sizes, allowing the user to resize the sheet by dragging it.
struct ContentView: View {
    @State private var sheetShown = false
    @State private var query = ""

    var body: some View {
        Button("Display bottom sheet") {
            sheetShown = true
        }
        .sheet(isPresented: $sheetShown) {
            NavigationStack {
                Text("You query: \(query)")
                    .searchable(text: $query)
                    .navigationTitle("Search")
            }
            .presentationDetents([.medium, .large])
        }
    }
}
The new bottom sheet API is very flexible and allows you to tune the height of the sheet as you need by using the following options.
struct ContentView: View {
    @State private var sheetShown = false
    @State private var query = ""

    var body: some View {
        Button("Display bottom sheet") {
            sheetShown = true
        }
        .sheet(isPresented: $sheetShown) {
            NavigationStack {
                Text("You query: \(query)")
                    .searchable(text: $query)
                    .navigationTitle("Search")
            }
            .presentationDetents(
                [
                    .fraction(0.2),
                    .height(300),
                    .fraction(0.5),
                    .height(600)
                ]
            )
        }
    }
}
As you can see in the example above, we use the fraction function to set the height of the sheet to a particular fraction of the available space. You can also use the height function to set the height to a fixed size. Remember that you can mix different options to achieve the appearance you need.
Depending on the current environment, we might need to build a super custom sizing logic. For example, I would like to display a bottom sheet by taking full size whenever accessibility fonts enabled. We can implement this custom presentation logic and reuse it across multiple screens.
struct MyCustomDetent: CustomPresentationDetent {
    static func height(in context: Context) -> CGFloat? {
        if context.dynamicTypeSize.isAccessibilitySize {
            return context.maxDetentValue
        } else {
            return context.maxDetentValue * 0.8
        }
    }
}
First, we should create a type conforming to the CustomPresentationDetent protocol. Second, we should implement the only required function called height which takes the context as the parameter. Parameter context holds all the SwiftUI’s environment values, and you can use it to decide what height you need in a particular environment. I use vertical size classes in the example above to decide on the sheet’s height.
struct ContentView: View {
    @State private var sheetShown = false
    @State private var query = ""

    var body: some View {
        Button("Display bottom sheet") {
            sheetShown = true
        }
        .sheet(isPresented: $sheetShown) {
            NavigationStack {
                Text("You query: \(query)")
                    .searchable(text: $query)
                    .navigationTitle("Search")
            }
            .presentationDetents([.medium, .custom(MyCustomDetent.self)])
        }
    }
}
You can change the size of the bottom sheet not only by dragging but also in a programmatic way. In this case, you have to pass the Binding to the selected size among the available sizes.
struct ContentView: View {
    @State private var sheetShown = false
    @State private var sheetSize: PresentationDetent = .medium

    var body: some View {
        VStack {
            Picker("Size", selection: $sheetSize) {
                Text("Medium").tag(PresentationDetent.medium)
                Text("Large").tag(PresentationDetent.large)
            }

            Button("Display bottom sheet") {
                sheetShown = true
            }
            .sheet(isPresented: $sheetShown) {
                NavigationStack {
                    Text("Sheet content")
                }
                .presentationDetents([.medium, .large], selection: $sheetSize)
            }
        }
    }
}
Besides the sheet size, we can customize the drag indicator of the bottom sheet. We can make it always visible, hidden, or allow SwiftUI to decide whether it should be visible.
struct ContentView: View {
    @State private var sheetShown = false
    @State private var query = ""

    var body: some View {
        Button("Display bottom sheet") {
            sheetShown = true
        }
        .sheet(isPresented: $sheetShown) {
            NavigationStack {
                Text("You query: \(query)")
                    .searchable(text: $query)
                    .navigationTitle("Search")
            }
            .presentationDetents([.medium, .large])
            .presentationDragIndicator(.hidden)
        }
    }
}
By using the presentationCornerRadius view modifier we can easily tune the corner radius of the presented bottom sheet.
struct ContentView: View {
    @State private var sheetShown = false
    @State private var query = ""

    var body: some View {
        Button("Display bottom sheet") {
            sheetShown = true
        }
        .sheet(isPresented: $sheetShown) {
            NavigationStack {
                Text("You query: \(query)")
                    .searchable(text: $query)
                    .navigationTitle("Search")
            }
            .presentationDetents([.medium, .large])
            .presentationCornerRadius(16)
        }
    }
}
The presentationBackground view modifier allows us to set any instance of the ShapeStyle as the background of the bottom sheet.
struct ContentView: View {
    @State private var sheetShown = false
    @State private var query = ""

    var body: some View {
        Button("Display bottom sheet") {
            sheetShown = true
        }
        .sheet(isPresented: $sheetShown) {
            NavigationStack {
                Text("You query: \(query)")
                    .searchable(text: $query)
                    .navigationTitle("Search")
            }
            .presentationDetents([.medium, .large])
            .presentationBackground(Material.ultraThin)
        }
    }
}
As you can see in the example above, we set the ultra thin material as the background of the presented bottom sheet. Another version of the presentationBackground view modifier allows us to set the custom SwiftUI view as the background of the bottom sheet.
struct ContentView: View {
    @State private var sheetShown = false
    @State private var query = ""

    var body: some View {
        Button("Display bottom sheet") {
            sheetShown = true
        }
        .sheet(isPresented: $sheetShown) {
            NavigationStack {
                Text("You query: \(query)")
                    .searchable(text: $query)
                    .navigationTitle("Search")
            }
            .presentationDetents([.medium, .large])
            .presentationBackground {
                    VStack {
                        RoundedRectangle(cornerRadius: 8)
                        RoundedRectangle(cornerRadius: 16)
                        RoundedRectangle(cornerRadius: 24)
                    }
                }
        }
    }
}
Whenever the content of the bottom sheet contains the scrolling views you can configure what the first user interaction with the bottom sheet should do: scroll or resize the sheet. By default it resize the sheet, but you can tune this behavior using the presentationContentInteraction view modifier.
struct ContentView: View {
    @State private var sheetShown = false
    @State private var query = ""

    var body: some View {
        Button("Display bottom sheet") {
            sheetShown = true
        }
        .sheet(isPresented: $sheetShown) {
            NavigationStack {
                Text("You query: \(query)")
                    .searchable(text: $query)
                    .navigationTitle("Search")
            }
            .presentationDetents([.medium, .large])
            .presentationContentInteraction(.scrolls)
        }
    }
}
We can also control whenever the content behind a bottom sheet should be interactive while presenting the bottom sheet.
struct ContentView: View {
    @State private var sheetShown = false
    @State private var query = ""

    var body: some View {
        Button("Display bottom sheet") {
            sheetShown = true
        }
        .sheet(isPresented: $sheetShown) {
            NavigationStack {
                Text("You query: \(query)")
                    .searchable(text: $query)
                    .navigationTitle("Search")
            }
            .presentationDetents([.medium, .large])
            .presentationBackgroundInteraction(.enabled(upThrough: .large))
        }
    }
}
Today we learned how to use and customize the new bottom sheet API in SwiftUI. I love the level of customization it provides. I hope you enjoy the post. Feel free to follow me on Twitter and ask your questions related to this post. Thanks for reading, and see you next week!