Introducing Jujutsu VCS
I’ve been using Jujutsu VCS for a few months now, and it’s completely changed how I work with version control. No — it’s not a martial art — it’s a modern, Git-compatible version control system that blends the reliability of Git with a much more fluid and intuitive workflow.
Compare designs, show rulers, add a grid, quick actions for recent builds. Create recordings with touches & audio, trim and export them into MP4 or GIF and share them anywhere using drag & drop. Add bezels to screenshots and videos. Try now
First and foremost, Jujutsu VCS is Git‑compatible. You can use it with any Git repository, and nobody on your team will notice a difference — even if they continue using Git.
For the rest of the article, I’ll refer to Jujutsu VCS as JJ. To install JJ, follow these instructions. To start working with JJ, clone a Git repository or initialize an empty one using the following terminal commands:
jj git clone repo_url
or
jj git init
Let’s talk about how JJ differs from Git. In JJ, you work with changes instead of commits, and those changes remain mutable until you push them to a remote. That means you can freely move between changes and edit them.
jj new
Instead of committing your code after the fact, you create an empty change before you start writing. There’s no staging area — JJ automatically tracks everything you modify. A change contains a series of snapshots of your code. Every time you run a JJ command in the terminal, it makes a snapshot and appends it to the most recent change.
When you finish work on the current change and want to start another, use:
jj desc -m “describe the work you have done”
jj new
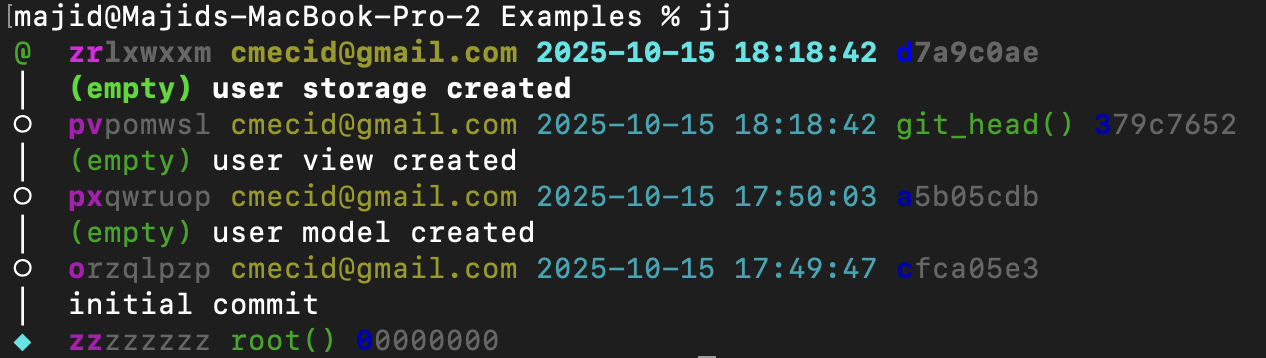
Changes make history manipulation simple. Rebase, squash, and split are everyday operations. Here’s the log of my repo. Suppose I want to insert a change between the last two changes — nothing could be easier.
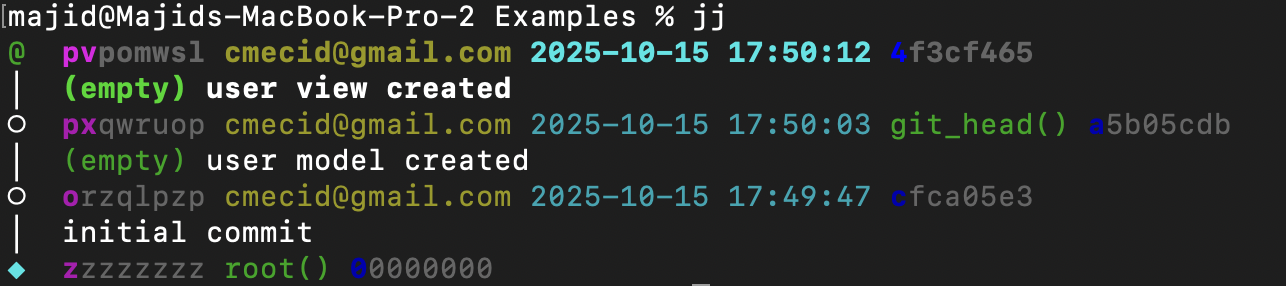
To insert a change after a specific one:
jj new -A px
The -A argument means “after”; it creates an empty change after the change with ID px. You can also use -B to create an empty change “before” px. The great thing about inserting changes is that JJ automatically rebases subsequent changes. That’s my favorite thing about JJ: when you change history, it automatically rebases, and it rarely results in conflicts.
jj squash
The squash command is another simple, powerful tool: it appends the most recent change to the previous one.
jj squash –into px
Use the into argument to specify which change to squash into, and JJ will automatically rebase subsequent changes as needed.
jj undo
Another great utility is undo. You can always call it to revert the most recent operation — snapshot, rebase, squash, merge, and so on.
jj new master
jj new master
Creating more than one change with the same parent is enough to start branching in JJ. Branches are anonymous — they don’t have names. That might seem odd at first, but it works really well. If you need a Git‑compatible branch, set a bookmark on a change.
jj bookmark set new-feature
jj git push -b new-feature
Finally, to delete a change, run:
jj abandon px
This removes the change and its code, then rebases subsequent changes.
JJ reimagines version control, making history manipulation effortless. It’s fully compatible with Git but offers a more flexible, fluid workflow. I’ll share more advanced techniques — such as rebasing across branches — in future posts. I hope you enjoyed this one. Feel free to follow me on Twitter and ask any questions related to this post. Thanks for reading, and see you next week!