Introducing Jujutsu VCS. Edit Workflow.
The absence of a staging area and automatic rebases makes our usage of Jujutsu VCS significantly different from what we used to do in Git. There are several popular workflows within the Jujutsu VCS community. This week, I’ll discuss the workflow I use daily, which is called the edit workflow.
Compare designs, show rulers, add a grid, quick actions for recent builds. Create recordings with touches & audio, trim and export them into MP4 or GIF and share them anywhere using drag & drop. Add bezels to screenshots and videos. Try now
When you begin using Jujutsu VCS, the first thing you’ll notice is the absence of a staging area. Instead, it captures snapshots of your code every time you run the jj command in the terminal. This approach significantly differs from our workflows in Git.
To learn more about the basics of the Jujutsu VCS, take a look at my “Introducing Jujutsu VCS” post.
Constant snapshots and automatic rebases played a significant role in the development of the edit workflow. I’ve been utilizing this workflow since the first day and can’t express my gratitude enough. Here’s how we do it.
Assume that you are working on a feature requiring new model type, some sort of state storage and the view part that manipulates models via storage. We plan the work and split it into a few changes. So, we create empty changes.
jj new -m “introducing user model”
jj new -m “introducing user storage”
jj new -m “introducing user master and details views”
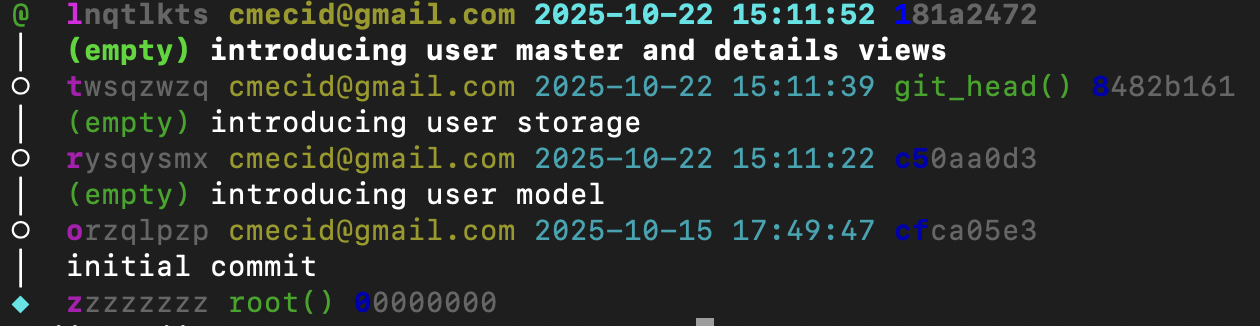
Now we have three empty changes in the jj log. Let’s start populating them with the code. Let’s switch to the first change using the edit command.
jj edit rysqysmx
We can use the edit command to switch to any mutable change in the log. As you can see, we define the change using the short identifier indicated in the log. Now, we can express our user model. As soon as we finished our work on the user model we can move to the next part of the task and create user storage.
jj next —edit
We employ the next command with the edit argument to navigate to the subsequent change in the tree. While we can still utilize the edit command with the specific identifier, I find the next command more convenient in this workflow. Whenever you move to the next change, jj executes rebase, and you’re working in the fresh state, encompassing all previous changes.
Assume, you forgot an entity while planing your changes and now you need to squeeze in a change. No worries, you can use the new command with particular positioning in the tree of changes.
jj new -A r -m “introducing user endpoint”
As you can see, we use the new command with -A argument allowing us to create a change after a particular change. We can also use -B to create before a change. And don’t worry about the state of your changes, jj automatically makes rebases and you are always in a fresh state.
The final piece of this workflow is the absorb command. Imagine that you almost finished the work on your feature then requirements changes and a new property on the user model appeared. This addition requires modifications in almost every change you have been working recently.
Instead of switching between changes using the edit command, we can create a new change.
jj new -m “Adding a new property to the user model to display in the user view”
You add a new property to the user model, tune the user master and details view to render it. It would be much better to have these changes in previous changes. Fortunately, there is the absorb command.
jj absorb
You can use the absorb command on the recent change to find the best place for that change between the mutable changes in your history. It automatically moves a property addition part of the change to the user model changes where you created that model, and user view modifications to the changes where you created those views.
The absorb command uses blame to find the best place, but it can keep some modifications in the recent change if it can find a good place for them. So, it works in a very safe manner.
Once you get used to automatic rebases and the ability to reshuffle or absorb changes effortlessly, going back to Git’s manual staging and rebasing feels unnecessarily rigid. The edit workflow isn’t just a new habit; it’s a mindset shift — from managing commits to shaping history as you go. I hope you enjoyed this one. Feel free to follow me on Twitter and ask any questions related to this post. Thanks for reading, and see you next week!