Managing Data Flow in SwiftUI
Last week we talked about “Animations and Transitions in SwiftUI”. But it’s time to touch the crucial aspect of every app, and it is Data Flow. All the apps have data to present or mutate. Data plays a vital role in apps using SwiftUI. Every view in SwiftUI is just a function of some state, where the state is our data.
Fetching data from local/remote storage
Today we will build a small app which uses core SwiftUI concepts like Binding and ObservableObject. Assume that you work on the app, which has two primary responsibilities:
- Fetch and show the list of employees from local or remote storage
- Edit personal information about selected employee
Let’s start with describing our model layer.
import SwiftUI
import Combine

struct Person: Identifiable {
    let id: UUID
    var name: String
    var age: Int
}

final class PersonStore: ObservableObject {
    @Published var persons: [Person] = [
        .init(id: .init(), name: "Majid", age: 27),
        .init(id: .init(), name: "John", age: 31),
        .init(id: .init(), name: "Fred", age: 25)
    ]
}
Here we have simple Person struct which conforms Identifiable protocol. The single requirement of Identifiable is Hashable id field. We implement it by defining id as UUID. We also can use Int instead of UUID.
Next, we can implement PersonStore class, which is providing data for our view. PersonStore type conforms to ObservableObject it will allow SwiftUI to refresh the view as soon as any of @Published fields change.
Now let’s take a look at PersonListView.
struct PersonsView : View {
    @ObservedObject var store: PersonStore

    var body: some View {
        NavigationView {
            List(store.persons) { person in
                VStack(alignment: .leading) {
                    Text(person.name)
                        .font(.headline)
                    Text("Age: \(person.age)")
                        .font(.subheadline)
                        .foregroundColor(.secondary)
                }
            }
        }.navigationBarTitle(Text("Persons"))
    }
}
We use List component to present an array of Person structs. Every row in List contains VStack with two Text components representing the name and age of a Person. We call fetch method on store object as soon as List appears. As you remember, our PersonStore object notifies SwiftUI about data changes, and SwiftUI rebuilds the view to present new data.
Editing
Next step is creating a new view which allows us to edit personal information of selected Person. We will use Form component to show nice form for data entry. You can check “Building forms with SwiftUI” to learn more about Form component and its advantages. Let’s dive into code which represents editing view.
struct EditingView: View {
    @Environment(\.presentationMode) var presentation
    @Binding var person: Person

    var body: some View {
        Form {
            Section(header: Text("Personal information")) {
                TextField("type something...", text: $person.name)
                Stepper(value: $person.age) {
                    Text("Age: \(person.age)")
                }
            }

            Section {
                Button("Save") {
                    self.presentation.wrappedValue.dismiss()
                }
            }
        }.navigationBarTitle(Text(person.name))
    }
}
Here we use Binding for selected person item. Binding Property Wrapper allows passing a reference to a value type. By using Binding property, EditingView can read and mutate the Person struct, but it doesn’t store a copy of it. We use this Binding to mutate value inside PersonsStore and as soon as we do that SwiftUI will update the view with the updated list of Persons. If you want to learn more about Property Wrappers available in SwiftUI like @Binding, @Environment, @EnvironmentObject, @ObservedObject, please take a look at the “Understanding Property Wrappers in SwiftUI”.
Now let’s refactor our PersonsView to support editing by passing Binding to a selected Person inside EditingView.
import Foundation

extension RandomAccessCollection {
    func indexed() -> Array<(offset: Int, element: Element)> {
        Array(enumerated())
    }
}

import SwiftUI

struct PersonsView : View {
    @ObservedObject var store: PersonStore

    var body: some View {
        NavigationView {
            List {
                ForEach(store.persons.indexed(), id: \.1.id) { index, person in
                    NavigationLink(destination: EditingView(person: self.$store.persons[index])) {
                        VStack(alignment: .leading) {
                            Text(person.name)
                                .font(.headline)
                            Text("Age: \(person.age)")
                                .font(.subheadline)
                                .foregroundColor(.secondary)
                        }
                    }
                }
            }
            .onAppear(perform: store.fetch)
            .navigationBarTitle(Text("Persons"))
        }
    }
}
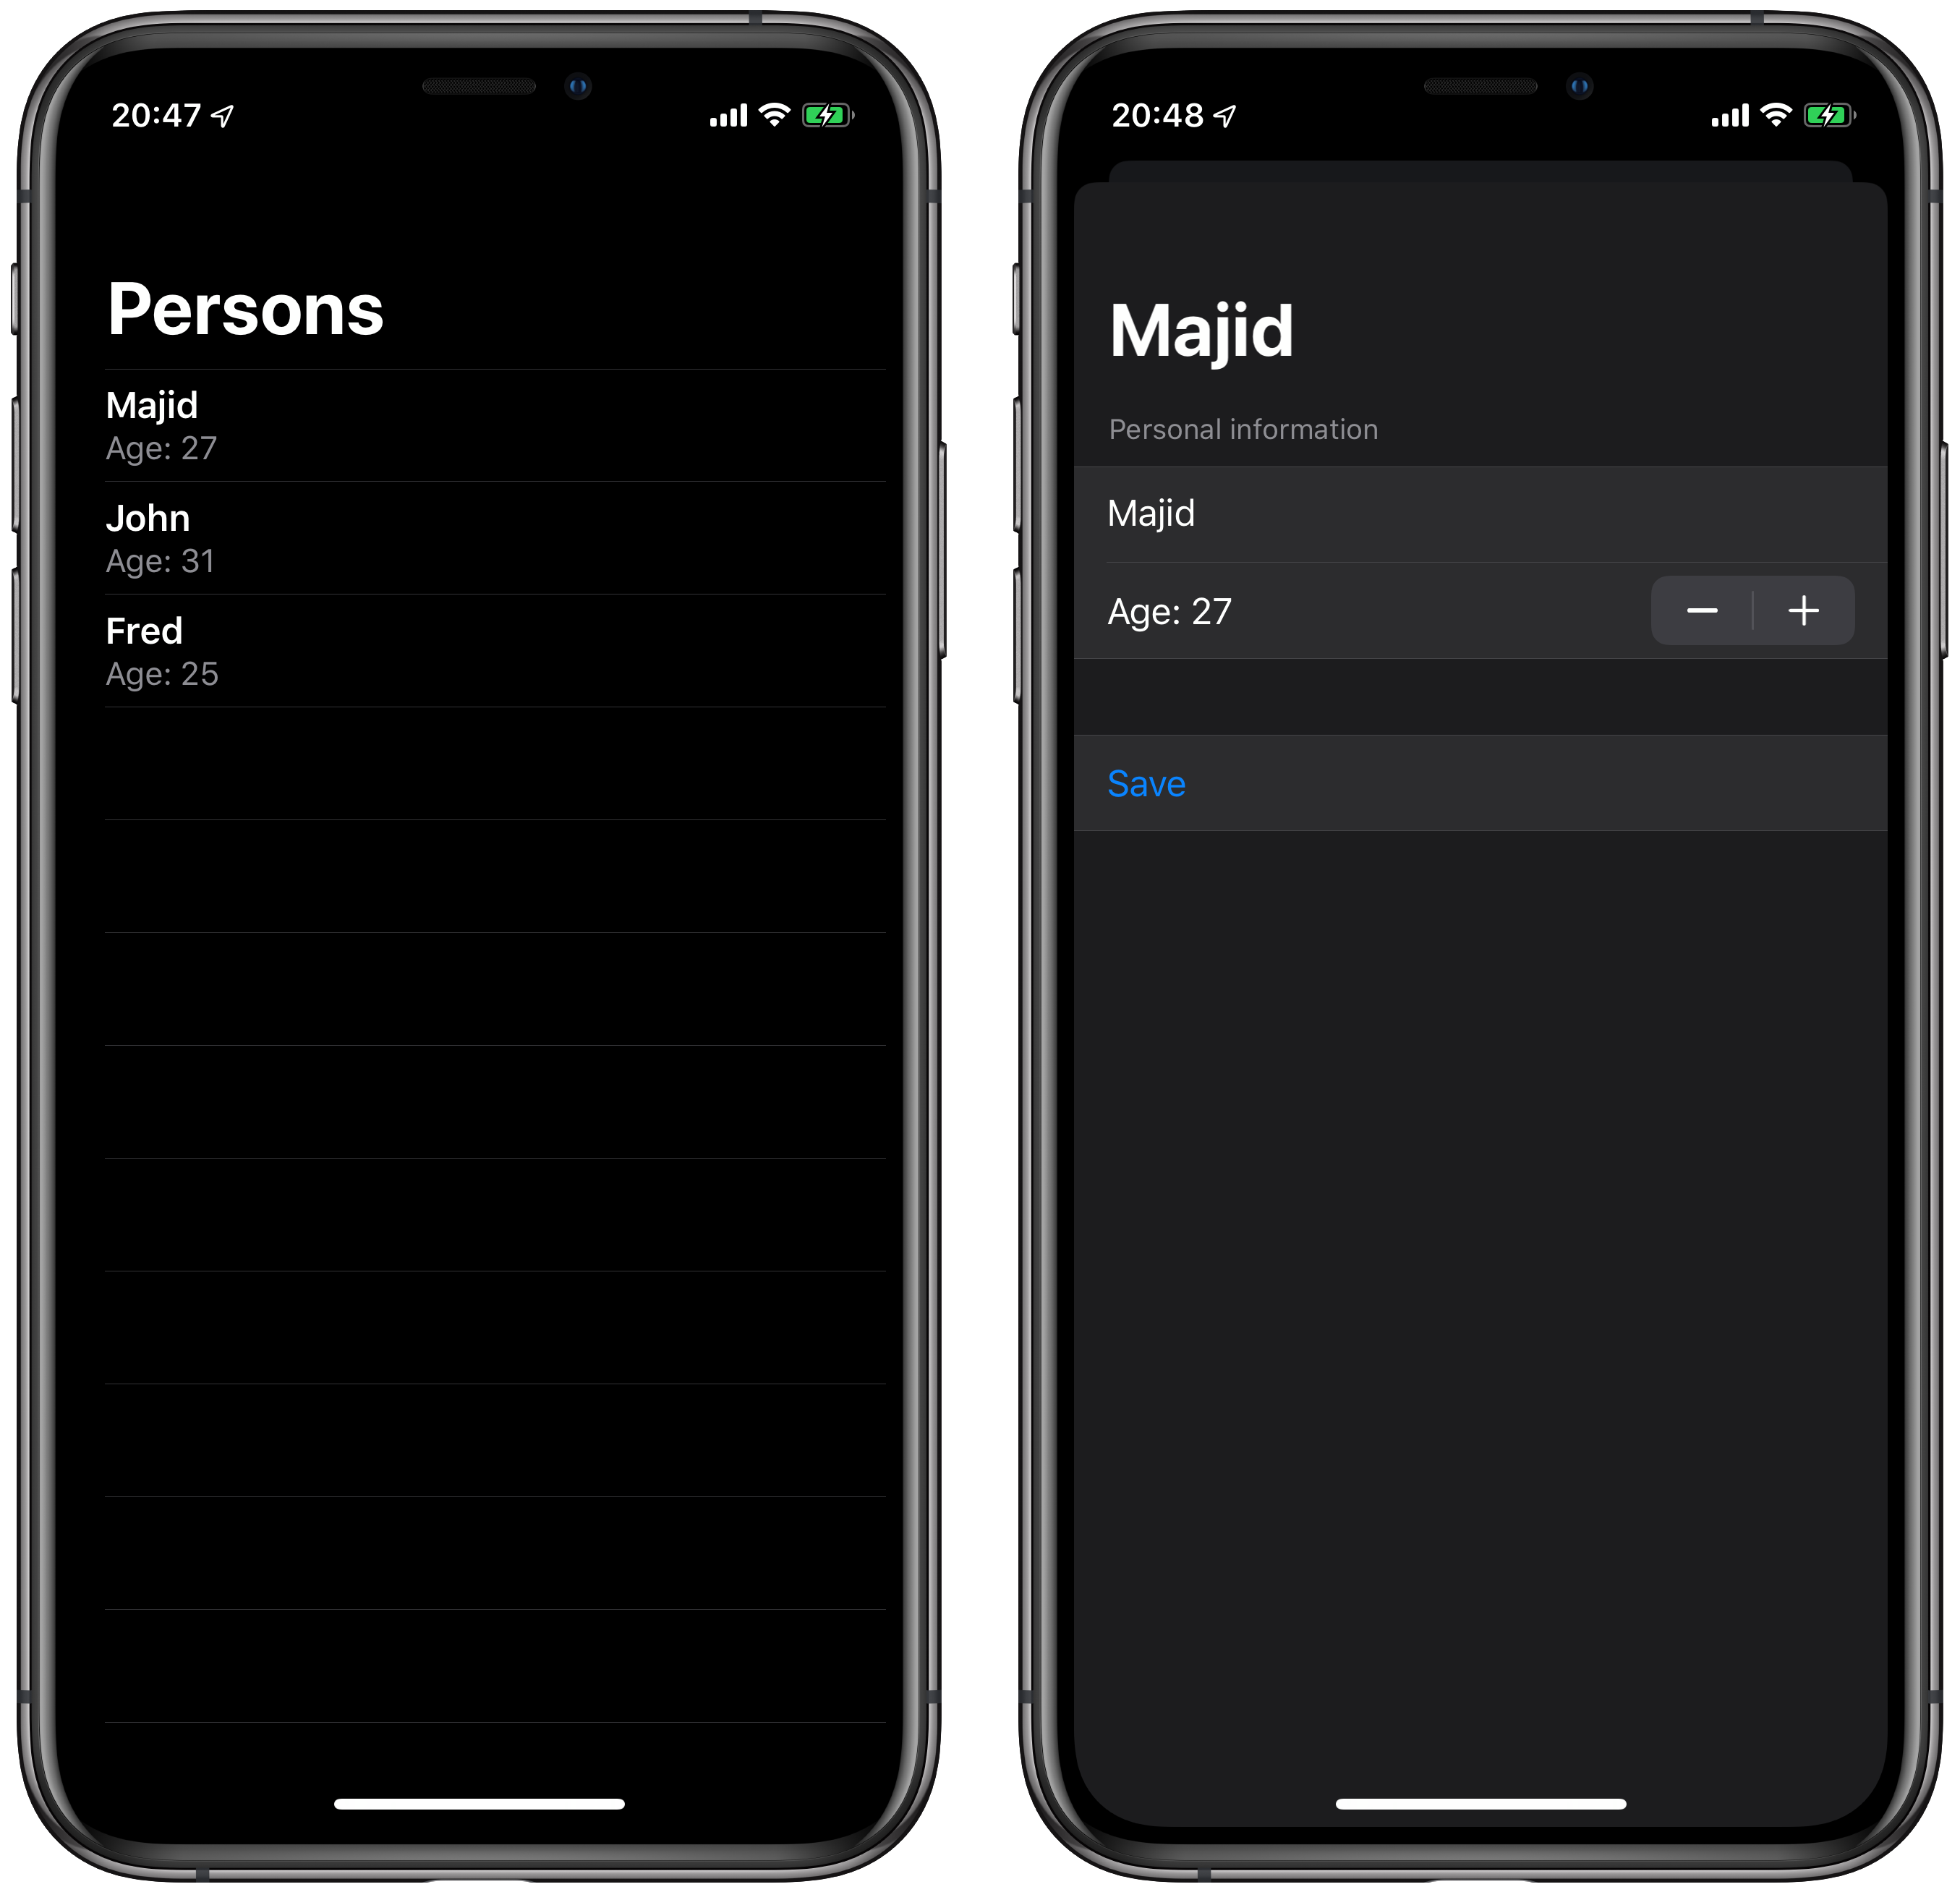
And here is the screenshot of our app, you can see how it looks.
Conclusion
Today we built simple Master-Detail flow in SwiftUI. I’ve tried to show the power of Bindings in SwiftUI. You don’t need to post notifications or observe key-values to indicate changes in your User Interface, all you need is using correct Property Wrapper provided by SwiftUI. Again, if you want to learn when and which one should be used, check out my post about Property Wrappers in SwiftUI. Feel free to follow me on Twitter and ask your questions related to this post. Thanks for reading and see you next week!